 Page 2


Lab 4
Page 2
The computer's screen is divided into a large number of tiny dots of color called pixels. These dots are so small that, to the human eye, they appear to make a continuous picture, but if you zoom in on any computer graphic, you will eventually begin to see the blocks of solid color of which the image is composed. To give you an idea of their size, the dot of an "i" is usually represented by a single pixel.
A typical monitor can display about 1024 pixels in the horizontal direction, and 768 in the vertical, making almost 800,000 pixels. This figure is known as the resolution for monitors (it's calculated differently for printers, though the idea is the same). Since a monitor has fixed dimensions, switching to a higher resolution causes is to display many more smaller pixels -- so you see more but everything is smaller.
| The same Desktop at three different resolutions | ||
 |
 |
 |
| 1024 x 768 | 800 x 600 | 640 x 480 |
Each pixel has its own color, typically represented by three values, one for red, one for blue, and one for green (RGB). These values control how much of that color appears in the pixel. Black would be all zeros, while white would have max values. Pure red would have just the red value raised to the max, while bluish-green might have the blue and the green values set to half of the max, and the red value set to zero. All colors are represented by a combination of the three colors red, blue, and green.
In HTML, rather than use the name of the color as described in Lab 3, you can also
use the RGB definition of the color in a manner similar to what is described above.
Once again we start by using a tag to define the font color, and then using another tag to
show where the color change ends. Instead of the name, we use "#rrggbb", where rr represents how much
red we want, gg represents how nuch green and bb represents how much blue. The values are in
hexadecimal, so each digit ranges from 0 to F. This means that the range for each 2-digit
color is 00 to FF, or in decimal, 0 to 255. For example
Usually, the fewer pixels a monitor displays (lower resolution), the more colors it allows for each one. This is because it only has a certain amount of space in which to keep information about all of the pixels -- so if it needs to keep track of more pixels, each one will get fewer color options. For instance, your computer might have the following settings:
The number of colors a display uses is known as its Color Depth. Color depth is also used to describe digital images. Unlike your screen, however, which has a fixed pixel-to-color relationship, images you create can usually be of any size and color depth. Ideally, you could always work with as many colors as possible, making photo-realistic images. Often, however, images which "use" 16 million colors will look the same in 256 colors. This is because they're not actually using more than 256 of the 16 million available colors.
Since large pictures take up more disk space and load more slowly on the Web, you'll probably want to experiment with your images and see how few colors you can use before the image looks bad.
There are other ways to make image files smaller. Normally, images are saved as bit-maps. Each pixel and its color information are saved separately. This preserves the image perfectly but takes much more space than is necessary. Since most images have large blocks of color, we can use that information to group pixels and store less information about them. If there are five blue pixels in a row, it's probably better to remember "blue, 5" than to remember "blue, blue, blue, blue, blue".
Taking advantage of pixel similarities to reduce the stored information is called compression. You will not need to worry about the specific techniques used to compress files. Instead, you can use two file formats which do this automatically.
| Transparent | Not Transparent |
 |
To save your image as one of these types of files, just choose GIF or JPG from the box underneath the Filename in the "Save As.." window.
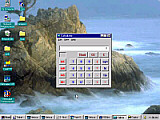
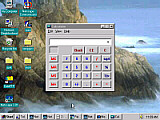
To create and edit images, you must use an Image Editor such as Adobe's PhotoShop, Corel's PhotoPaint or any number of other graphics programs. In this lab, you will be using PaintShop Pro. While it does not have as many features as PhotoShop, it is much simpler to use and much less expensive.
Generally, image editors are pretty self-explanatory. They usually display one or more large white canvasses with a bar or window of tools. Choosing a paintbrush and dragging it on the the canvas works much like painting in real life. Choosing the paint bucket and clicking on an area will fill it with the current color. Soon enough, you will get a chance to experiment with all of these options.
Once you have drawn an image, however, you may wish to play with several of the Image Filters available. These can be found at the bottom of the Image menu. When selected, these Image filters (e.g. Sharpen, Emboss, etc.) will examine and possibly change each and every pixel in the image. The Sharpen filter, for example, looks for edges (places where the color changes dramatically) and enhances those.
| Blurry image | After Sharpen |
 |
 |
Many filters only work on images with 16 million colors (24-bit color). This is usually because they make subtle color changes to the image and need to use many different shades.
| PREVIOUS | 1 | 2 | 3 | 4 | 5 | 6 | 7 | NEXT |