COS 126 Recursive Graphics Submissions, Spring 2014


NAME AND DESCRIPTION N = 1 N = 2 N = 3 N = 4 N = 5 N = 6
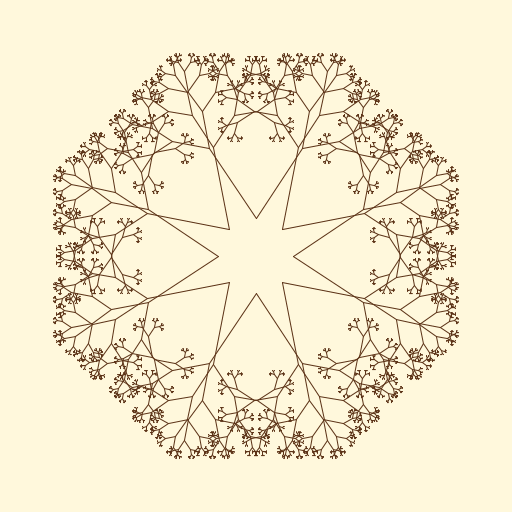
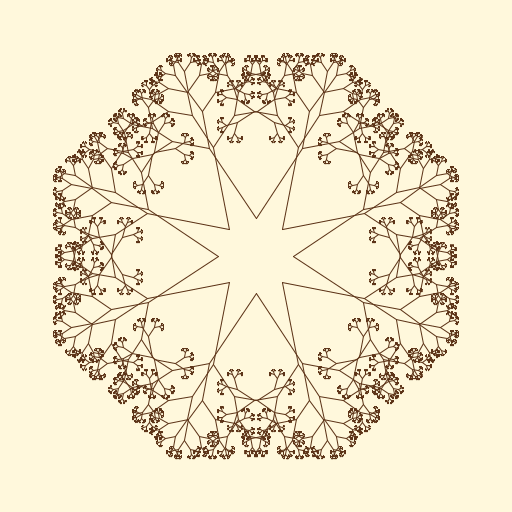
Angela Hillsman

I found a fractals in nature page on Pintrest, where I found a picture which inspired me to make 8 overlapping trees, which meant having 8 separate methods. I then realized that I could have each method call on other methods to change the tilt of each branch. Originally, I produced something relatively similar to the photograph, but as I made it more complex I drifted away and tried to find the coolest pattern given the length and angle of each branch. I like the more modern pattern I ended up with, that's snowflake-esque.
I found a fractals in nature page on Pintrest, where I found a picture which inspired me to make 8 overlapping trees, which meant having 8 separate methods. I then realized that I could have each method call on other methods to change the tilt of each branch. Originally, I produced something relatively similar to the photograph, but as I made it more complex I drifted away and tried to find the coolest pattern given the length and angle of each branch. I like the more modern pattern I ended up with, that's snowflake-esque. I found a fractals in nature page on Pintrest, where I found a picture which inspired me to make 8 overlapping trees, which meant having 8 separate methods. I then realized that I could have each method call on other methods to change the tilt of each branch. Originally, I produced something relatively similar to the photograph, but as I made it more complex I drifted away and tried to find the coolest pattern given the length and angle of each branch. I like the more modern pattern I ended up with, that's snowflake-esque. I found a fractals in nature page on Pintrest, where I found a picture which inspired me to make 8 overlapping trees, which meant having 8 separate methods. I then realized that I could have each method call on other methods to change the tilt of each branch. Originally, I produced something relatively similar to the photograph, but as I made it more complex I drifted away and tried to find the coolest pattern given the length and angle of each branch. I like the more modern pattern I ended up with, that's snowflake-esque. I found a fractals in nature page on Pintrest, where I found a picture which inspired me to make 8 overlapping trees, which meant having 8 separate methods. I then realized that I could have each method call on other methods to change the tilt of each branch. Originally, I produced something relatively similar to the photograph, but as I made it more complex I drifted away and tried to find the coolest pattern given the length and angle of each branch. I like the more modern pattern I ended up with, that's snowflake-esque. I found a fractals in nature page on Pintrest, where I found a picture which inspired me to make 8 overlapping trees, which meant having 8 separate methods. I then realized that I could have each method call on other methods to change the tilt of each branch. Originally, I produced something relatively similar to the photograph, but as I made it more complex I drifted away and tried to find the coolest pattern given the length and angle of each branch. I like the more modern pattern I ended up with, that's snowflake-esque. I found a fractals in nature page on Pintrest, where I found a picture which inspired me to make 8 overlapping trees, which meant having 8 separate methods. I then realized that I could have each method call on other methods to change the tilt of each branch. Originally, I produced something relatively similar to the photograph, but as I made it more complex I drifted away and tried to find the coolest pattern given the length and angle of each branch. I like the more modern pattern I ended up with, that's snowflake-esque.
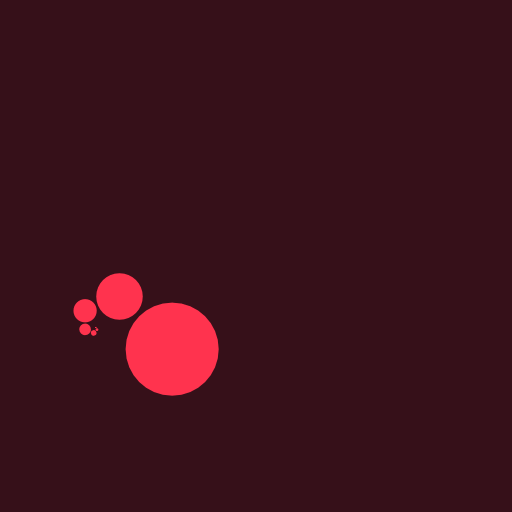
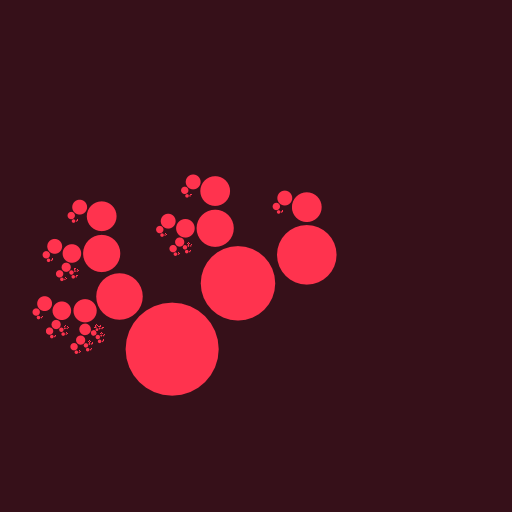
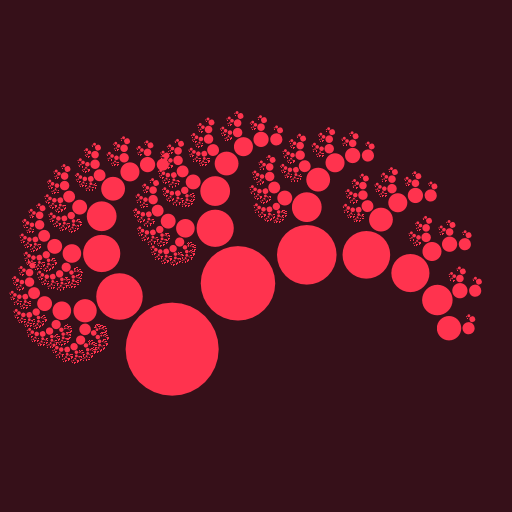
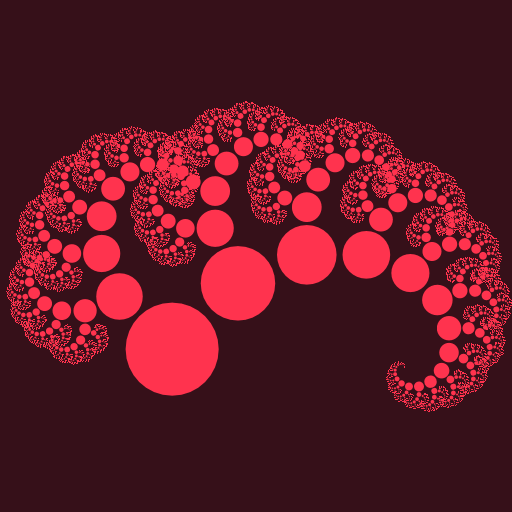
Lamia Ateshian

I got my inspiration from an image I found online. I started with the biggest "backbone" spiral in the center by drawing a circle, then having each subsequent circle come out at an angle that was a fixed angle subtracted from the previous angle, so that it would create a spiraling shape. The difficulty was making more spirals branching out at 90 degree angles from each "backbone" spiral. N corresponds to the number of circles in each spiral, not to the "level" of recursion. The level is actually fixed every time by putting a lower bound on the radius. I followed one of the example student submissions by converting N to 2^N-1 so that it could show a higher level of iteration.
I got my inspiration from an image I found online. I started with the biggest I got my inspiration from an image I found online. I started with the biggest I got my inspiration from an image I found online. I started with the biggest I got my inspiration from an image I found online. I started with the biggest I got my inspiration from an image I found online. I started with the biggest I got my inspiration from an image I found online. I started with the biggest
Alice Xie

My design creates an overall picture of the seasons of the year through trees and the color of their foliage/branches. In order to write the program, I had to use trigonometry to calculate the different angles at which the tree branches would stem off into as well as account for the difference in the lengths of branches close to and farther away from the trunk. Color was also alternated throughout the code to create a more realistic picture. Recursion was used to create the dividing action of branches, and only two recursions were made for each tree, although many more could have been made to added if I wanted to.
My design creates an overall picture of the seasons of the year through trees and the color of their foliage/branches. In order to write the program, I had to use trigonometry to calculate the different angles at which the tree branches would stem off into as well as account for the difference in the lengths of branches close to and farther away from the trunk. Color was also alternated throughout the code to create a more realistic picture. Recursion was used to create the dividing action of branches, and only two recursions were made for each tree, although many more could have been made to added if I wanted to. My design creates an overall picture of the seasons of the year through trees and the color of their foliage/branches. In order to write the program, I had to use trigonometry to calculate the different angles at which the tree branches would stem off into as well as account for the difference in the lengths of branches close to and farther away from the trunk. Color was also alternated throughout the code to create a more realistic picture. Recursion was used to create the dividing action of branches, and only two recursions were made for each tree, although many more could have been made to added if I wanted to. My design creates an overall picture of the seasons of the year through trees and the color of their foliage/branches. In order to write the program, I had to use trigonometry to calculate the different angles at which the tree branches would stem off into as well as account for the difference in the lengths of branches close to and farther away from the trunk. Color was also alternated throughout the code to create a more realistic picture. Recursion was used to create the dividing action of branches, and only two recursions were made for each tree, although many more could have been made to added if I wanted to. My design creates an overall picture of the seasons of the year through trees and the color of their foliage/branches. In order to write the program, I had to use trigonometry to calculate the different angles at which the tree branches would stem off into as well as account for the difference in the lengths of branches close to and farther away from the trunk. Color was also alternated throughout the code to create a more realistic picture. Recursion was used to create the dividing action of branches, and only two recursions were made for each tree, although many more could have been made to added if I wanted to. My design creates an overall picture of the seasons of the year through trees and the color of their foliage/branches. In order to write the program, I had to use trigonometry to calculate the different angles at which the tree branches would stem off into as well as account for the difference in the lengths of branches close to and farther away from the trunk. Color was also alternated throughout the code to create a more realistic picture. Recursion was used to create the dividing action of branches, and only two recursions were made for each tree, although many more could have been made to added if I wanted to. My design creates an overall picture of the seasons of the year through trees and the color of their foliage/branches. In order to write the program, I had to use trigonometry to calculate the different angles at which the tree branches would stem off into as well as account for the difference in the lengths of branches close to and farther away from the trunk. Color was also alternated throughout the code to create a more realistic picture. Recursion was used to create the dividing action of branches, and only two recursions were made for each tree, although many more could have been made to added if I wanted to.
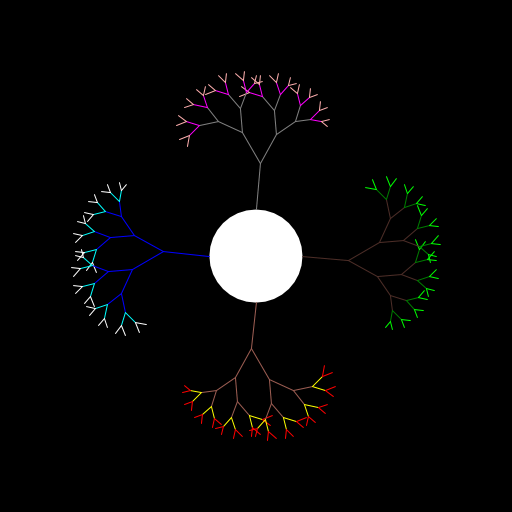
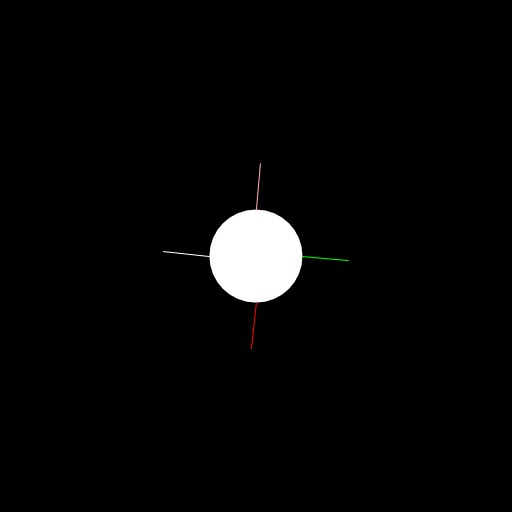
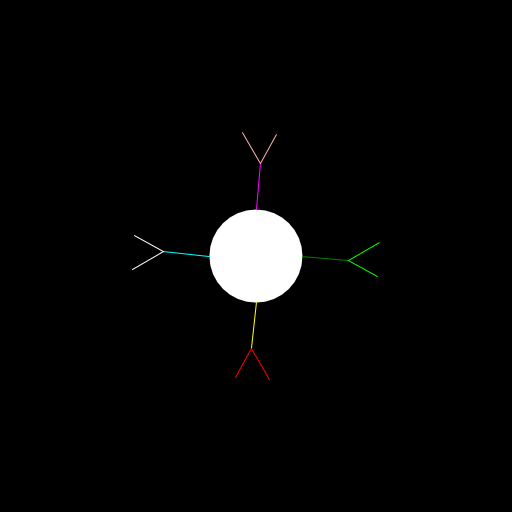
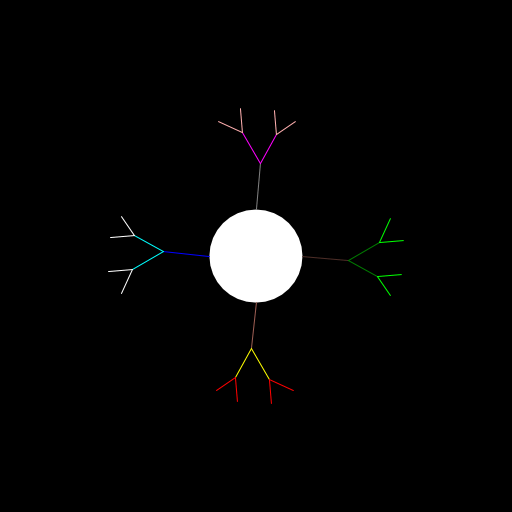
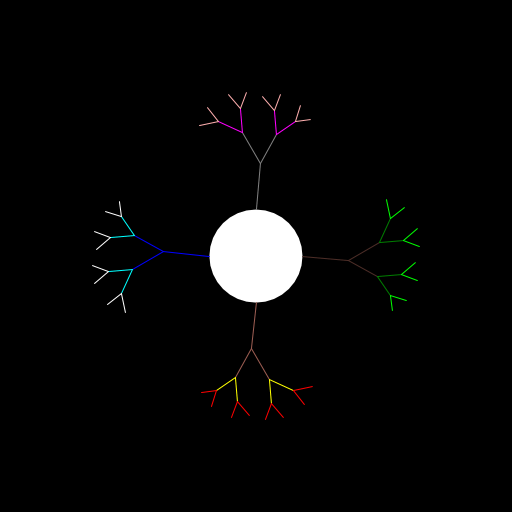
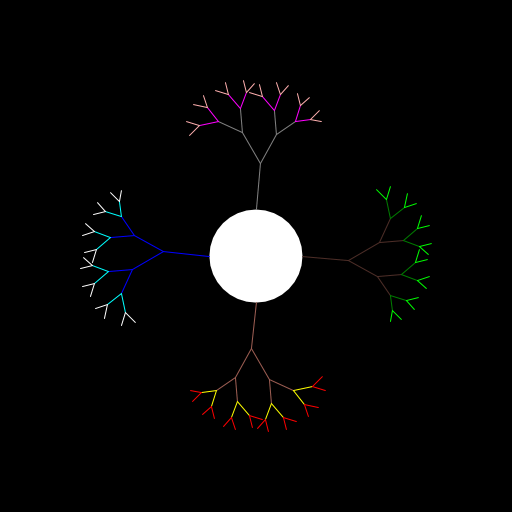
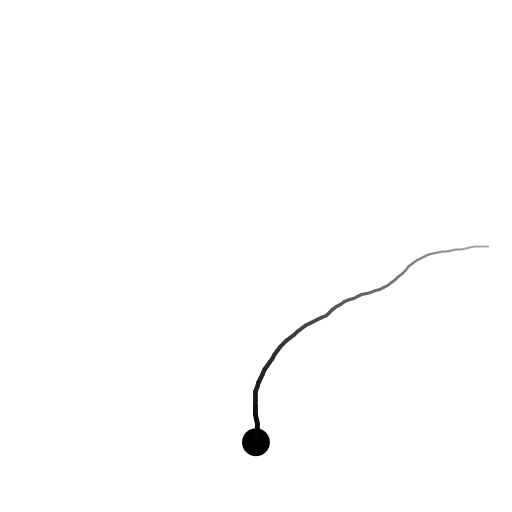
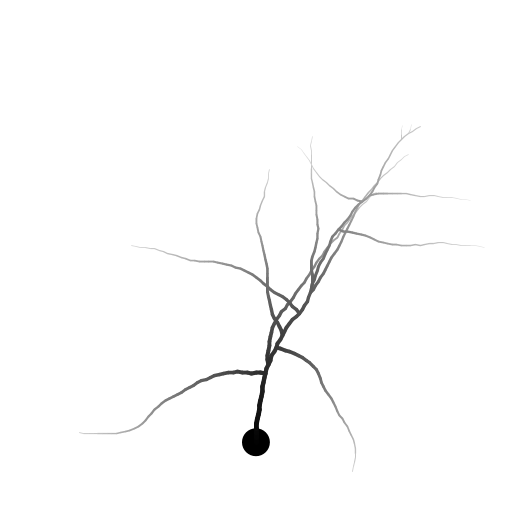
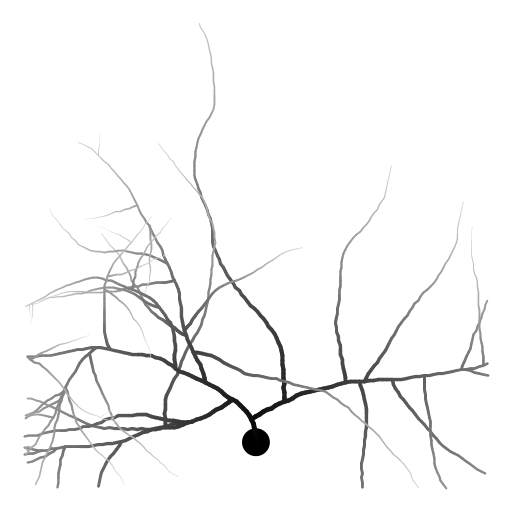
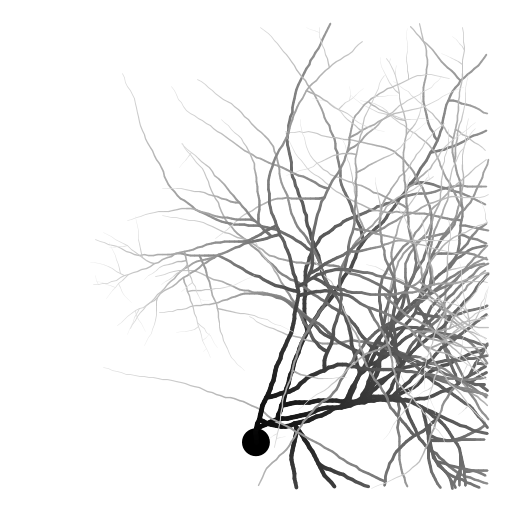
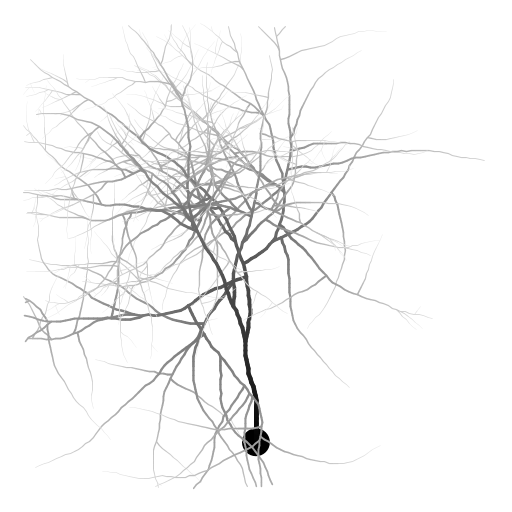
Byung Cheol Cho

My program draws a neuron with an axon and axon branches, extending from a cell body (soma). The thickness and color of the branch is adjusted depending on the distance from the soma. The structure was inspired by Purkinje cells in the cerebellum (http://en.wikipedia.org/wiki/Purkinje_cell) which are well-known for their extensive branching. Although the axon branches of Purkinje cells gravitate toward the edge of the cerebellum, the branches in this model are not influenced so strongly by direction. To write the program, I first wrote a function to draw a branch given a starting position and direction. At every step, the new coordinates are calculated and a line segment drawn, then the direction is randomly adjusted. I also prettified the image by changing the thickness and color of the line depending on how far along the axon/branch it is.
My program draws a neuron with an axon and axon branches, extending from a cell body (soma). The thickness and color of the branch is adjusted depending on the distance from the soma. The structure was inspired by Purkinje cells in the cerebellum (http://en.wikipedia.org/wiki/Purkinje_cell) which are well-known for their extensive branching. Although the axon branches of Purkinje cells gravitate toward the edge of the cerebellum, the branches in this model are not influenced so strongly by direction. To write the program, I first wrote a function to draw a branch given a starting position and direction. At every step, the new coordinates are calculated and a line segment drawn, then the direction is randomly adjusted. I also prettified the image by changing the thickness and color of the line depending on how far along the axon/branch it is. My program draws a neuron with an axon and axon branches, extending from a cell body (soma). The thickness and color of the branch is adjusted depending on the distance from the soma. The structure was inspired by Purkinje cells in the cerebellum (http://en.wikipedia.org/wiki/Purkinje_cell) which are well-known for their extensive branching. Although the axon branches of Purkinje cells gravitate toward the edge of the cerebellum, the branches in this model are not influenced so strongly by direction. To write the program, I first wrote a function to draw a branch given a starting position and direction. At every step, the new coordinates are calculated and a line segment drawn, then the direction is randomly adjusted. I also prettified the image by changing the thickness and color of the line depending on how far along the axon/branch it is. My program draws a neuron with an axon and axon branches, extending from a cell body (soma). The thickness and color of the branch is adjusted depending on the distance from the soma. The structure was inspired by Purkinje cells in the cerebellum (http://en.wikipedia.org/wiki/Purkinje_cell) which are well-known for their extensive branching. Although the axon branches of Purkinje cells gravitate toward the edge of the cerebellum, the branches in this model are not influenced so strongly by direction. To write the program, I first wrote a function to draw a branch given a starting position and direction. At every step, the new coordinates are calculated and a line segment drawn, then the direction is randomly adjusted. I also prettified the image by changing the thickness and color of the line depending on how far along the axon/branch it is. My program draws a neuron with an axon and axon branches, extending from a cell body (soma). The thickness and color of the branch is adjusted depending on the distance from the soma. The structure was inspired by Purkinje cells in the cerebellum (http://en.wikipedia.org/wiki/Purkinje_cell) which are well-known for their extensive branching. Although the axon branches of Purkinje cells gravitate toward the edge of the cerebellum, the branches in this model are not influenced so strongly by direction. To write the program, I first wrote a function to draw a branch given a starting position and direction. At every step, the new coordinates are calculated and a line segment drawn, then the direction is randomly adjusted. I also prettified the image by changing the thickness and color of the line depending on how far along the axon/branch it is. My program draws a neuron with an axon and axon branches, extending from a cell body (soma). The thickness and color of the branch is adjusted depending on the distance from the soma. The structure was inspired by Purkinje cells in the cerebellum (http://en.wikipedia.org/wiki/Purkinje_cell) which are well-known for their extensive branching. Although the axon branches of Purkinje cells gravitate toward the edge of the cerebellum, the branches in this model are not influenced so strongly by direction. To write the program, I first wrote a function to draw a branch given a starting position and direction. At every step, the new coordinates are calculated and a line segment drawn, then the direction is randomly adjusted. I also prettified the image by changing the thickness and color of the line depending on how far along the axon/branch it is. My program draws a neuron with an axon and axon branches, extending from a cell body (soma). The thickness and color of the branch is adjusted depending on the distance from the soma. The structure was inspired by Purkinje cells in the cerebellum (http://en.wikipedia.org/wiki/Purkinje_cell) which are well-known for their extensive branching. Although the axon branches of Purkinje cells gravitate toward the edge of the cerebellum, the branches in this model are not influenced so strongly by direction. To write the program, I first wrote a function to draw a branch given a starting position and direction. At every step, the new coordinates are calculated and a line segment drawn, then the direction is randomly adjusted. I also prettified the image by changing the thickness and color of the line depending on how far along the axon/branch it is.
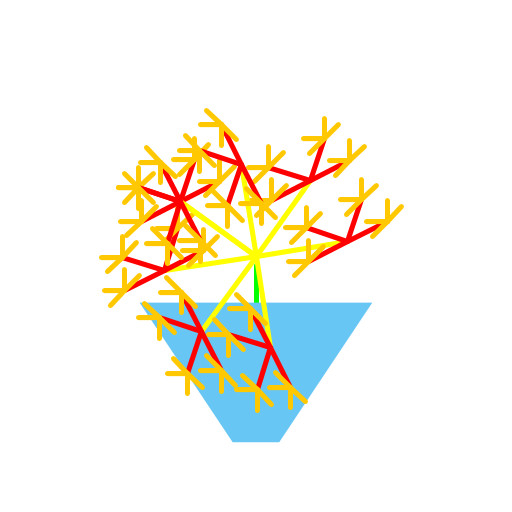
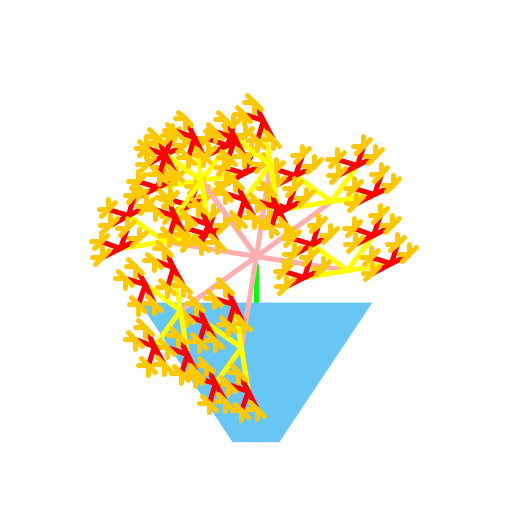
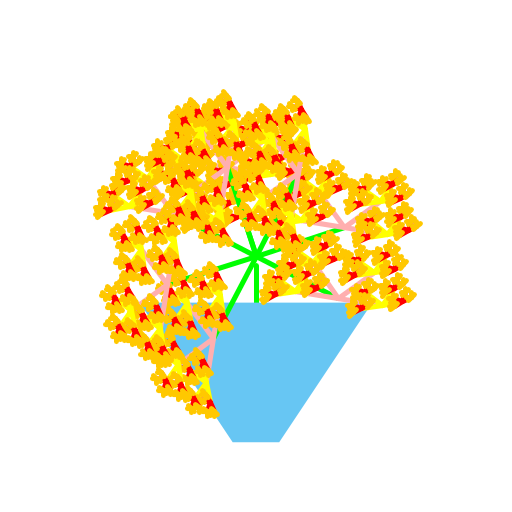
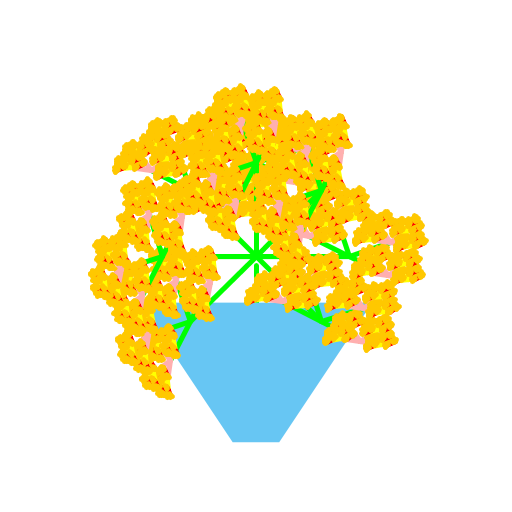
Catherine Niu

I created a flower pot with recursively drawn flower bunches that consist of four lines and that rotate at each recursion level. I used different colors for different recursion levels and used two recursive calls to generate the two sides of the bouquet. My recursion involves passing in an angle that rotates each bunch of four flower stems outward to form a filled out bouquet.
I created a flower pot with recursively drawn flower bunches that consist of four lines and that rotate at each recursion level. I used different colors for different recursion levels and used two recursive calls to generate the two sides of the bouquet. My recursion involves passing in an angle that rotates each bunch of four flower stems outward to form a filled out bouquet. I created a flower pot with recursively drawn flower bunches that consist of four lines and that rotate at each recursion level. I used different colors for different recursion levels and used two recursive calls to generate the two sides of the bouquet. My recursion involves passing in an angle that rotates each bunch of four flower stems outward to form a filled out bouquet. I created a flower pot with recursively drawn flower bunches that consist of four lines and that rotate at each recursion level. I used different colors for different recursion levels and used two recursive calls to generate the two sides of the bouquet. My recursion involves passing in an angle that rotates each bunch of four flower stems outward to form a filled out bouquet. I created a flower pot with recursively drawn flower bunches that consist of four lines and that rotate at each recursion level. I used different colors for different recursion levels and used two recursive calls to generate the two sides of the bouquet. My recursion involves passing in an angle that rotates each bunch of four flower stems outward to form a filled out bouquet. I created a flower pot with recursively drawn flower bunches that consist of four lines and that rotate at each recursion level. I used different colors for different recursion levels and used two recursive calls to generate the two sides of the bouquet. My recursion involves passing in an angle that rotates each bunch of four flower stems outward to form a filled out bouquet. I created a flower pot with recursively drawn flower bunches that consist of four lines and that rotate at each recursion level. I used different colors for different recursion levels and used two recursive calls to generate the two sides of the bouquet. My recursion involves passing in an angle that rotates each bunch of four flower stems outward to form a filled out bouquet.
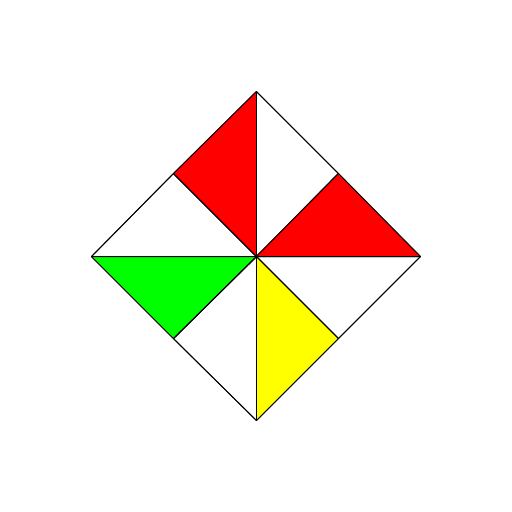
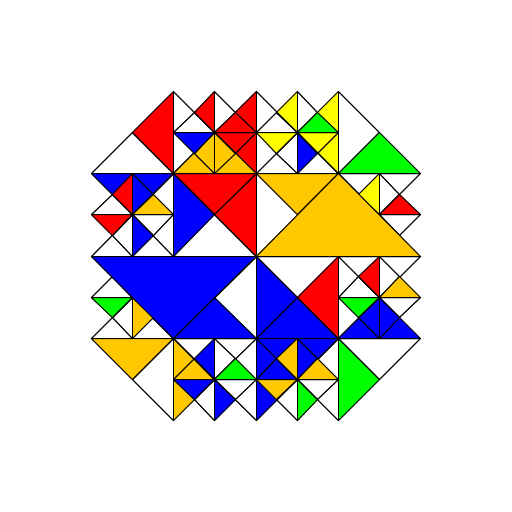
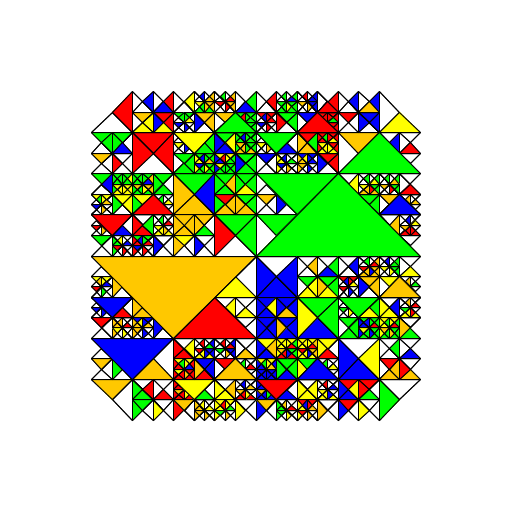
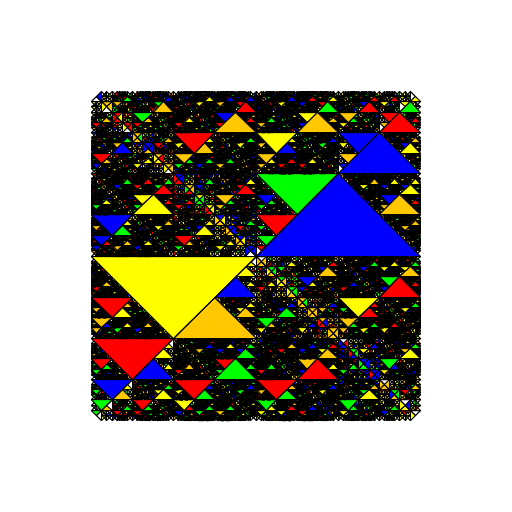
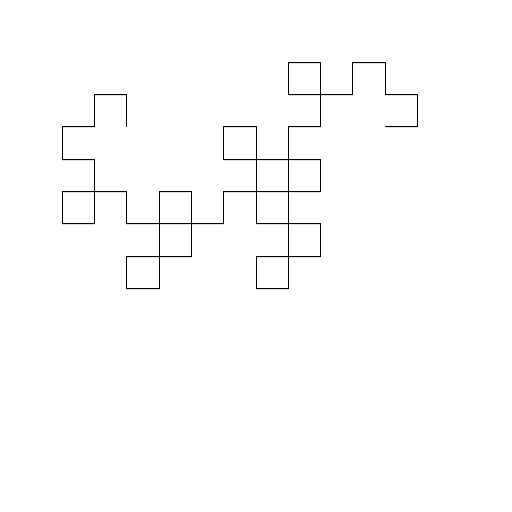
Ciara Nutter

I have always loved the artworks of M C Escher and his spirals of shapes and animals fitting with each other and converging in on themselves like fractals and recursion. I searched some of his pictures and decided that the best way I could try and recreate the style of Escher was through squares as they fit quite easily amongst themselves. I created 4 separate squares with diagonals in each going to different corners and one of the triangles formed within the squares randomly colored. The squares then repeated recursively on themselves on their outer middle point forming 4 more squares on each of the 4 original squares decreasing in size by a factor of 2 and also being filled in by randomly selected colors.
I have always loved the artworks of M C Escher and his spirals of shapes and animals fitting with each other and converging in on themselves like fractals and recursion. I searched some of his pictures and decided that the best way I could try and recreate the style of Escher was through squares as they fit quite easily amongst themselves. I created 4 separate squares with diagonals in each going to different corners and one of the triangles formed within the squares randomly colored. The squares then repeated recursively on themselves on their outer middle point forming 4 more squares on each of the 4  original squares decreasing in size by a factor of 2 and also being filled in by randomly selected colors. I have always loved the artworks of M C Escher and his spirals of shapes and animals fitting with each other and converging in on themselves like fractals and recursion. I searched some of his pictures and decided that the best way I could try and recreate the style of Escher was through squares as they fit quite easily amongst themselves. I created 4 separate squares with diagonals in each going to different corners and one of the triangles formed within the squares randomly colored. The squares then repeated recursively on themselves on their outer middle point forming 4 more squares on each of the 4  original squares decreasing in size by a factor of 2 and also being filled in by randomly selected colors. I have always loved the artworks of M C Escher and his spirals of shapes and animals fitting with each other and converging in on themselves like fractals and recursion. I searched some of his pictures and decided that the best way I could try and recreate the style of Escher was through squares as they fit quite easily amongst themselves. I created 4 separate squares with diagonals in each going to different corners and one of the triangles formed within the squares randomly colored. The squares then repeated recursively on themselves on their outer middle point forming 4 more squares on each of the 4  original squares decreasing in size by a factor of 2 and also being filled in by randomly selected colors. I have always loved the artworks of M C Escher and his spirals of shapes and animals fitting with each other and converging in on themselves like fractals and recursion. I searched some of his pictures and decided that the best way I could try and recreate the style of Escher was through squares as they fit quite easily amongst themselves. I created 4 separate squares with diagonals in each going to different corners and one of the triangles formed within the squares randomly colored. The squares then repeated recursively on themselves on their outer middle point forming 4 more squares on each of the 4  original squares decreasing in size by a factor of 2 and also being filled in by randomly selected colors. I have always loved the artworks of M C Escher and his spirals of shapes and animals fitting with each other and converging in on themselves like fractals and recursion. I searched some of his pictures and decided that the best way I could try and recreate the style of Escher was through squares as they fit quite easily amongst themselves. I created 4 separate squares with diagonals in each going to different corners and one of the triangles formed within the squares randomly colored. The squares then repeated recursively on themselves on their outer middle point forming 4 more squares on each of the 4  original squares decreasing in size by a factor of 2 and also being filled in by randomly selected colors. I have always loved the artworks of M C Escher and his spirals of shapes and animals fitting with each other and converging in on themselves like fractals and recursion. I searched some of his pictures and decided that the best way I could try and recreate the style of Escher was through squares as they fit quite easily amongst themselves. I created 4 separate squares with diagonals in each going to different corners and one of the triangles formed within the squares randomly colored. The squares then repeated recursively on themselves on their outer middle point forming 4 more squares on each of the 4  original squares decreasing in size by a factor of 2 and also being filled in by randomly selected colors.
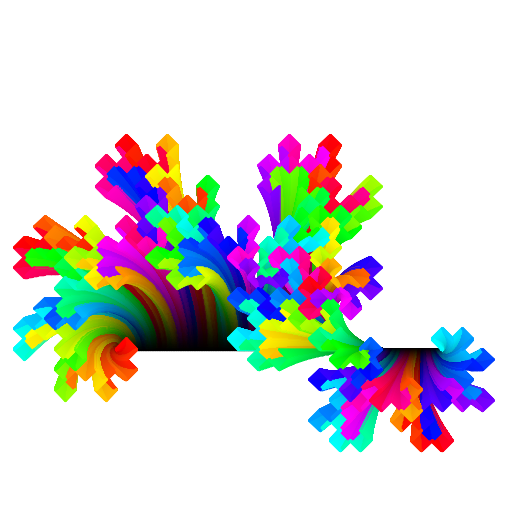
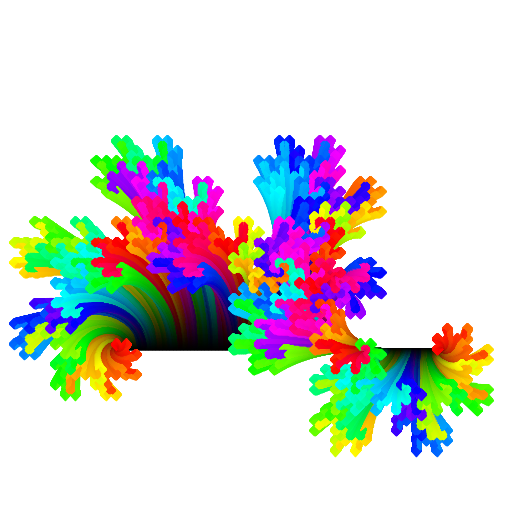
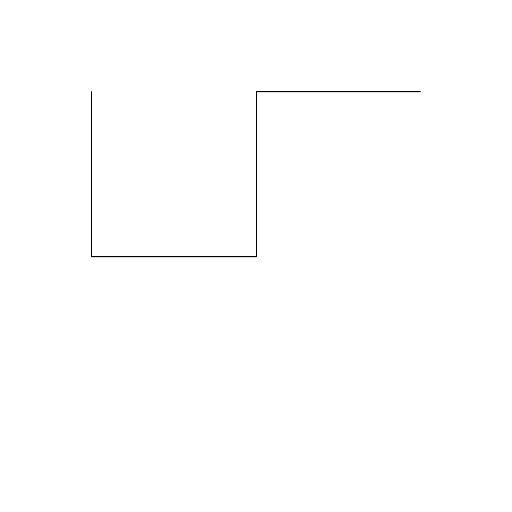
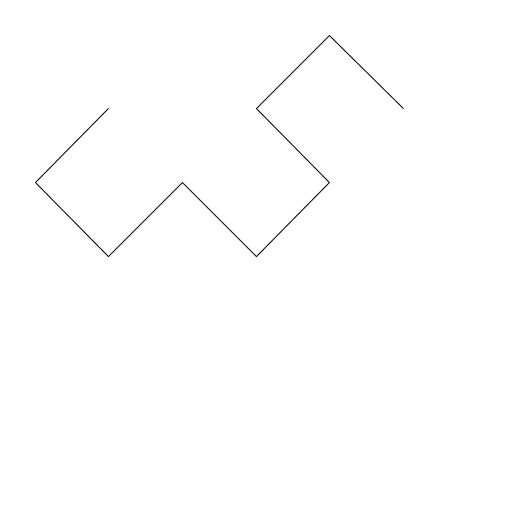
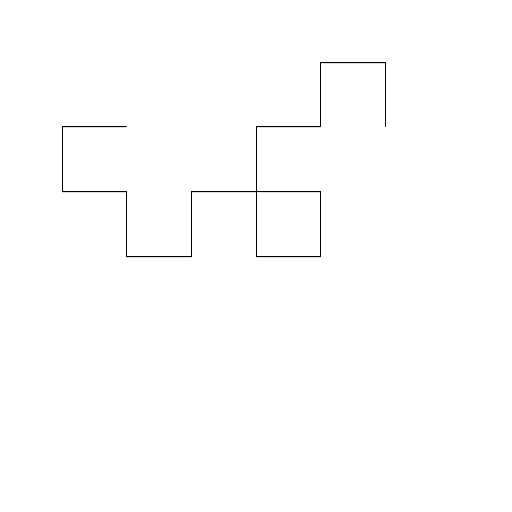
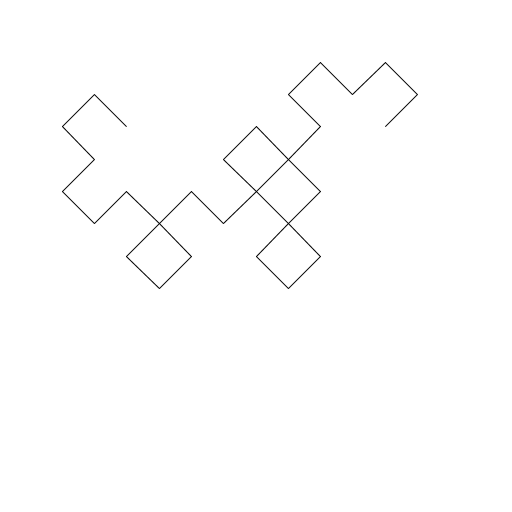
ds32

I based my fractal on the dragon curve. I used recursive function calls. After reading about fractal dimension, I made that a parameter and adjusted the other variables to change so that the fractal was still connected no matter what level. I was going to make it animate as the dimension increased but I forgot to clear the screen after each frame and I discovered it actually looked very interesting. I made a lot of adjustments so that the lines moved smoothly (originally they moved very quickly at first, then slowed). Finally, I added color.
I based my fractal on the dragon curve. I used recursive function calls. After reading about fractal dimension, I made that a parameter and adjusted the other variables to change so that the fractal was still connected no matter what level. I was going to make it animate as the dimension increased but I forgot to clear the screen after each frame and I discovered it actually looked very interesting. I made a lot of adjustments so that the lines moved smoothly (originally they moved very quickly at first, then slowed). Finally, I added color. I based my fractal on the dragon curve. I used recursive function calls. After reading about fractal dimension, I made that a parameter and adjusted the other variables to change so that the fractal was still connected no matter what level. I was going to make it animate as the dimension increased but I forgot to clear the screen after each frame and I discovered it actually looked very interesting. I made a lot of adjustments so that the lines moved smoothly (originally they moved very quickly at first, then slowed). Finally, I added color. I based my fractal on the dragon curve. I used recursive function calls. After reading about fractal dimension, I made that a parameter and adjusted the other variables to change so that the fractal was still connected no matter what level. I was going to make it animate as the dimension increased but I forgot to clear the screen after each frame and I discovered it actually looked very interesting. I made a lot of adjustments so that the lines moved smoothly (originally they moved very quickly at first, then slowed). Finally, I added color. I based my fractal on the dragon curve. I used recursive function calls. After reading about fractal dimension, I made that a parameter and adjusted the other variables to change so that the fractal was still connected no matter what level. I was going to make it animate as the dimension increased but I forgot to clear the screen after each frame and I discovered it actually looked very interesting. I made a lot of adjustments so that the lines moved smoothly (originally they moved very quickly at first, then slowed). Finally, I added color. I based my fractal on the dragon curve. I used recursive function calls. After reading about fractal dimension, I made that a parameter and adjusted the other variables to change so that the fractal was still connected no matter what level. I was going to make it animate as the dimension increased but I forgot to clear the screen after each frame and I discovered it actually looked very interesting. I made a lot of adjustments so that the lines moved smoothly (originally they moved very quickly at first, then slowed). Finally, I added color. I based my fractal on the dragon curve. I used recursive function calls. After reading about fractal dimension, I made that a parameter and adjusted the other variables to change so that the fractal was still connected no matter what level. I was going to make it animate as the dimension increased but I forgot to clear the screen after each frame and I discovered it actually looked very interesting. I made a lot of adjustments so that the lines moved smoothly (originally they moved very quickly at first, then slowed). Finally, I added color.
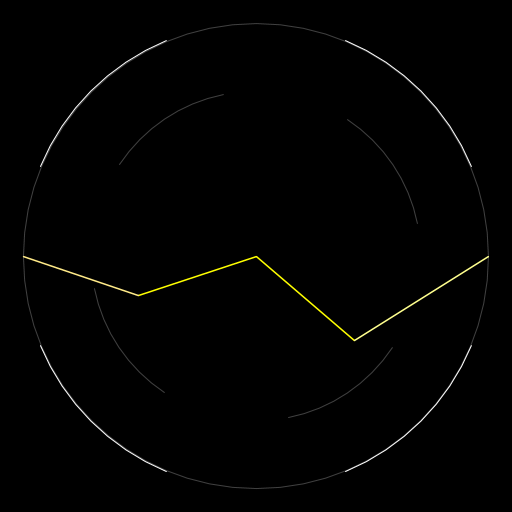
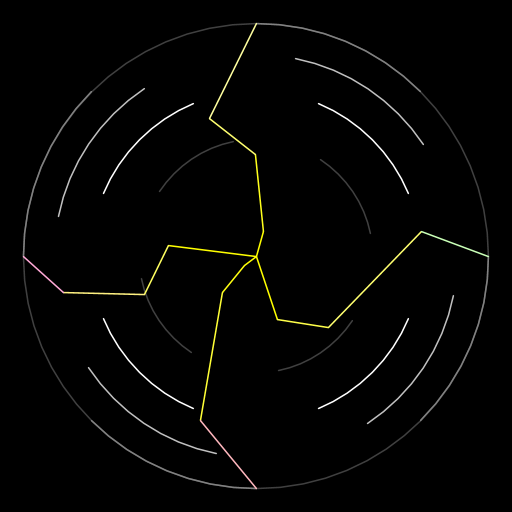
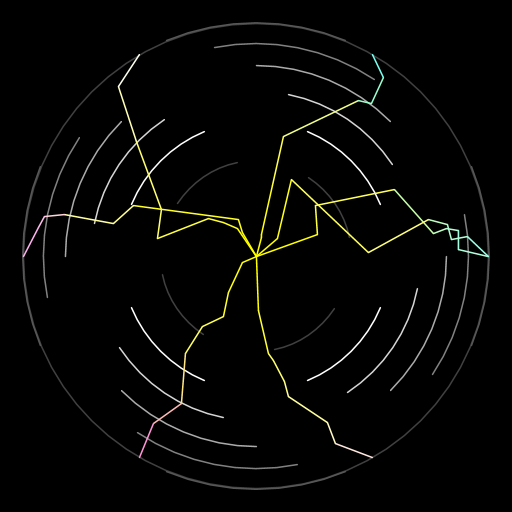
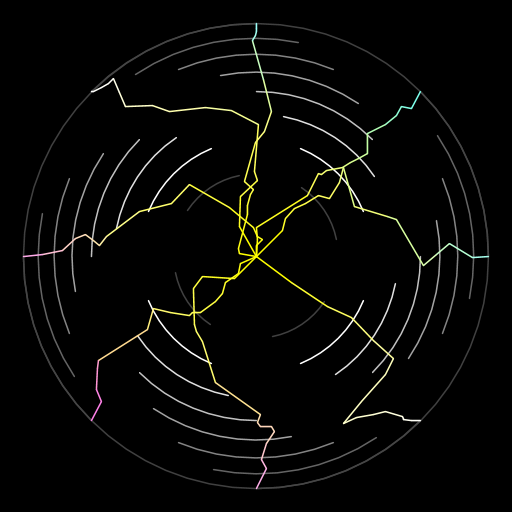
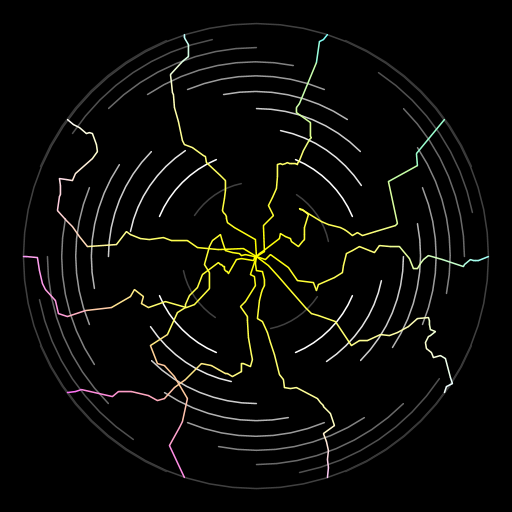
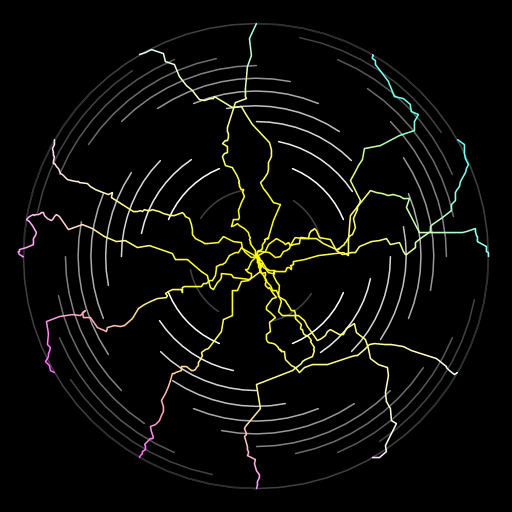
Elijah Kolmes

The artistic creation has two components: a series of randomized paths starting from the center of the field of view to the edges of a circle (which used the Brownian motion example) and the use of a scaling parameter to control the maximal allowed displacement for the vertex each time the method is called. This parameter is decreased by five percent with each level of recursion, so on smaller spatial scales, my paths become increasingly straight. The background is a spiral shape generated by a method that uses tail recursion to draw each successive "layer" of the spiral.
The artistic creation has two components: a series of randomized paths starting from the center of the field of view to the edges of a circle (which used the Brownian motion example) and the use of a scaling parameter to control the maximal allowed displacement for the vertex each time the method is called. This parameter is decreased by five percent with each level of recursion, so on smaller spatial scales, my paths become increasingly straight. The background is a spiral shape generated by a method that uses tail recursion to draw each successive The artistic creation has two components: a series of randomized paths starting from the center of the field of view to the edges of a circle (which used the Brownian motion example) and the use of a scaling parameter to control the maximal allowed displacement for the vertex each time the method is called. This parameter is decreased by five percent with each level of recursion, so on smaller spatial scales, my paths become increasingly straight. The background is a spiral shape generated by a method that uses tail recursion to draw each successive The artistic creation has two components: a series of randomized paths starting from the center of the field of view to the edges of a circle (which used the Brownian motion example) and the use of a scaling parameter to control the maximal allowed displacement for the vertex each time the method is called. This parameter is decreased by five percent with each level of recursion, so on smaller spatial scales, my paths become increasingly straight. The background is a spiral shape generated by a method that uses tail recursion to draw each successive The artistic creation has two components: a series of randomized paths starting from the center of the field of view to the edges of a circle (which used the Brownian motion example) and the use of a scaling parameter to control the maximal allowed displacement for the vertex each time the method is called. This parameter is decreased by five percent with each level of recursion, so on smaller spatial scales, my paths become increasingly straight. The background is a spiral shape generated by a method that uses tail recursion to draw each successive The artistic creation has two components: a series of randomized paths starting from the center of the field of view to the edges of a circle (which used the Brownian motion example) and the use of a scaling parameter to control the maximal allowed displacement for the vertex each time the method is called. This parameter is decreased by five percent with each level of recursion, so on smaller spatial scales, my paths become increasingly straight. The background is a spiral shape generated by a method that uses tail recursion to draw each successive The artistic creation has two components: a series of randomized paths starting from the center of the field of view to the edges of a circle (which used the Brownian motion example) and the use of a scaling parameter to control the maximal allowed displacement for the vertex each time the method is called. This parameter is decreased by five percent with each level of recursion, so on smaller spatial scales, my paths become increasingly straight. The background is a spiral shape generated by a method that uses tail recursion to draw each successive
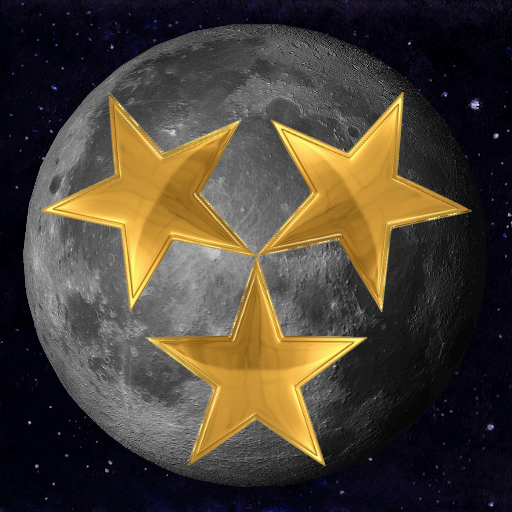
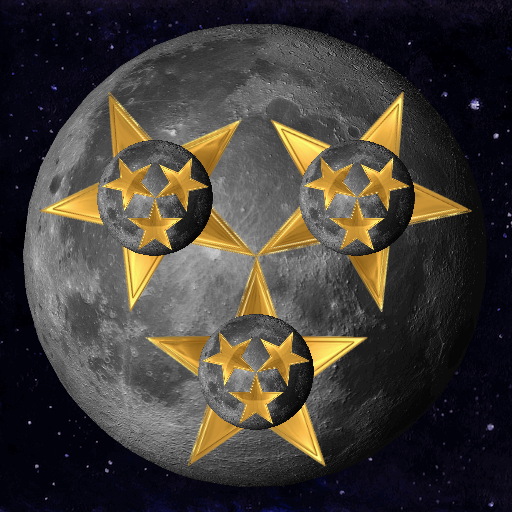
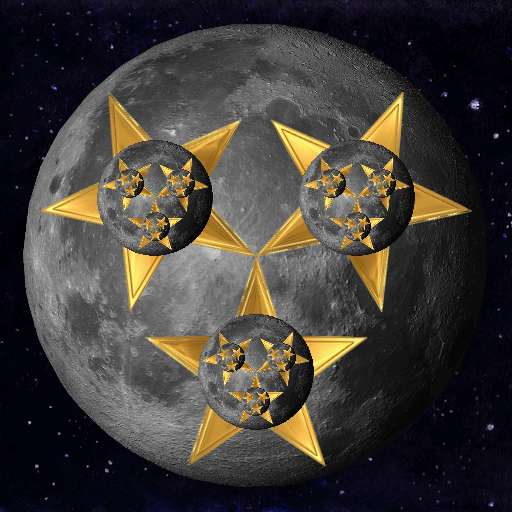
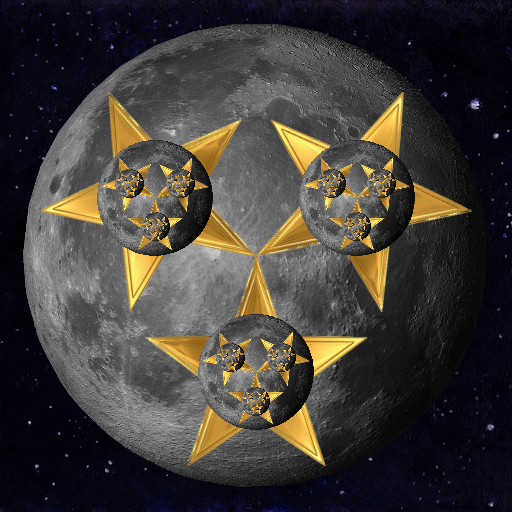
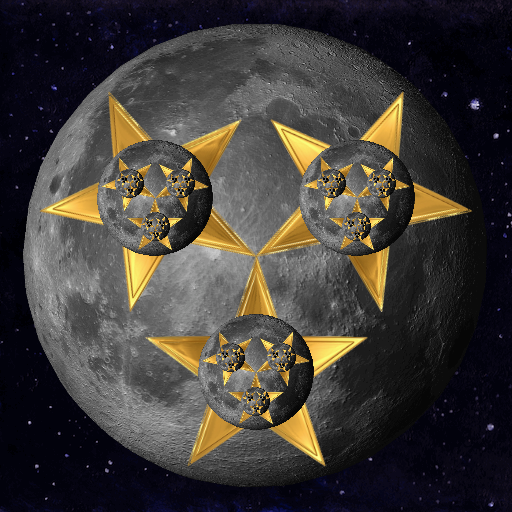
Isabel Cleff

My Art program displays a background of space, and then recursively draws the moon with three stars inside (and then the moon and three stars inside each star, etc.). I wrote the program by creating a method to display a picture of the moon, and a method to display a picture of a star. I then designed the call structure so that the moon and star method were mutually recursive. The image files themselves are from the internet. I edited them to better fit my purposes (scaling and size).
My Art program displays a background of space, and then recursively draws the moon with three stars inside (and then the moon and three stars inside each star, etc.). I wrote the program by creating a method to display a picture of the moon, and a method to display a picture of a star. I then designed the call structure so that the moon and star method were mutually recursive. The image files themselves are from the internet. I edited them to better fit my purposes (scaling and size). My Art program displays a background of space, and then recursively draws the moon with three stars inside (and then the moon and three stars inside each star, etc.). I wrote the program by creating a method to display a picture of the moon, and a method to display a picture of a star. I then designed the call structure so that the moon and star method were mutually recursive. The image files themselves are from the internet. I edited them to better fit my purposes (scaling and size). My Art program displays a background of space, and then recursively draws the moon with three stars inside (and then the moon and three stars inside each star, etc.). I wrote the program by creating a method to display a picture of the moon, and a method to display a picture of a star. I then designed the call structure so that the moon and star method were mutually recursive. The image files themselves are from the internet. I edited them to better fit my purposes (scaling and size). My Art program displays a background of space, and then recursively draws the moon with three stars inside (and then the moon and three stars inside each star, etc.). I wrote the program by creating a method to display a picture of the moon, and a method to display a picture of a star. I then designed the call structure so that the moon and star method were mutually recursive. The image files themselves are from the internet. I edited them to better fit my purposes (scaling and size). My Art program displays a background of space, and then recursively draws the moon with three stars inside (and then the moon and three stars inside each star, etc.). I wrote the program by creating a method to display a picture of the moon, and a method to display a picture of a star. I then designed the call structure so that the moon and star method were mutually recursive. The image files themselves are from the internet. I edited them to better fit my purposes (scaling and size). My Art program displays a background of space, and then recursively draws the moon with three stars inside (and then the moon and three stars inside each star, etc.). I wrote the program by creating a method to display a picture of the moon, and a method to display a picture of a star. I then designed the call structure so that the moon and star method were mutually recursive. The image files themselves are from the internet. I edited them to better fit my purposes (scaling and size).
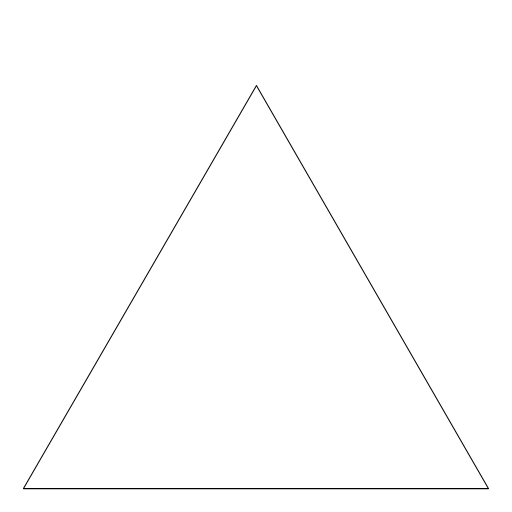
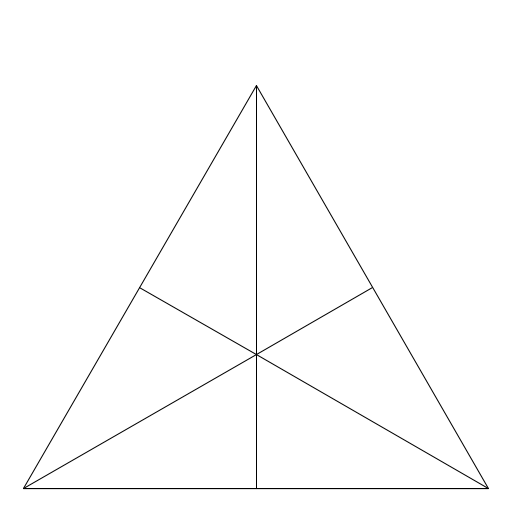
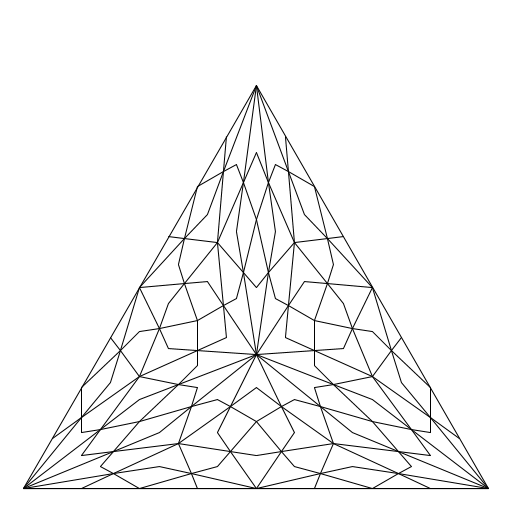
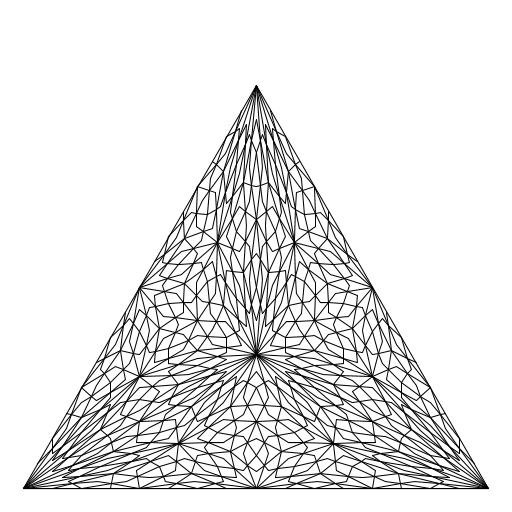
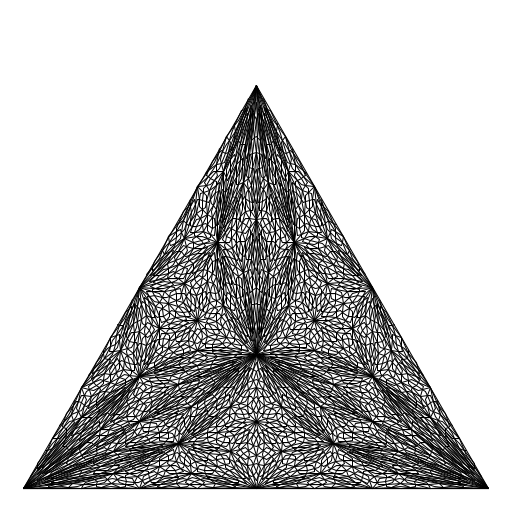
Josh Maccoby

My art uses Barycentric subdivision to divide an equilateral triangle and create a pattern. Only the lowest level of subdivision is displayed to reduce clutter. I found my information on Barycentric subdivision from a wikipedia article on fractals. I first wrote code that calculates the Barycenter, and then recursively calls itself to generate the Barycenter of each of the smaller triangles created by drawing lines from each vertex to the Barycenter. When n = 1, the program also draws line segments from the barycenter to each vertex and the midpoint of each side of each triangle.
My art uses Barycentric subdivision to divide an equilateral triangle and create a pattern. Only the lowest level of subdivision is displayed to reduce clutter. I found my information on Barycentric subdivision from a wikipedia article on fractals. I first wrote code that calculates the Barycenter, and then recursively calls itself to generate the Barycenter of each of the smaller triangles created by drawing lines from each vertex to the Barycenter. When n = 1, the program also draws line segments from the barycenter to each vertex and the midpoint of each side of each triangle. My art uses Barycentric subdivision to divide an equilateral triangle and create a pattern. Only the lowest level of subdivision is displayed to reduce clutter. I found my information on Barycentric subdivision from a wikipedia article on fractals. I first wrote code that calculates the Barycenter, and then recursively calls itself to generate the Barycenter of each of the smaller triangles created by drawing lines from each vertex to the Barycenter. When n = 1, the program also draws line segments from the barycenter to each vertex and the midpoint of each side of each triangle. My art uses Barycentric subdivision to divide an equilateral triangle and create a pattern. Only the lowest level of subdivision is displayed to reduce clutter. I found my information on Barycentric subdivision from a wikipedia article on fractals. I first wrote code that calculates the Barycenter, and then recursively calls itself to generate the Barycenter of each of the smaller triangles created by drawing lines from each vertex to the Barycenter. When n = 1, the program also draws line segments from the barycenter to each vertex and the midpoint of each side of each triangle. My art uses Barycentric subdivision to divide an equilateral triangle and create a pattern. Only the lowest level of subdivision is displayed to reduce clutter. I found my information on Barycentric subdivision from a wikipedia article on fractals. I first wrote code that calculates the Barycenter, and then recursively calls itself to generate the Barycenter of each of the smaller triangles created by drawing lines from each vertex to the Barycenter. When n = 1, the program also draws line segments from the barycenter to each vertex and the midpoint of each side of each triangle. My art uses Barycentric subdivision to divide an equilateral triangle and create a pattern. Only the lowest level of subdivision is displayed to reduce clutter. I found my information on Barycentric subdivision from a wikipedia article on fractals. I first wrote code that calculates the Barycenter, and then recursively calls itself to generate the Barycenter of each of the smaller triangles created by drawing lines from each vertex to the Barycenter. When n = 1, the program also draws line segments from the barycenter to each vertex and the midpoint of each side of each triangle. My art uses Barycentric subdivision to divide an equilateral triangle and create a pattern. Only the lowest level of subdivision is displayed to reduce clutter. I found my information on Barycentric subdivision from a wikipedia article on fractals. I first wrote code that calculates the Barycenter, and then recursively calls itself to generate the Barycenter of each of the smaller triangles created by drawing lines from each vertex to the Barycenter. When n = 1, the program also draws line segments from the barycenter to each vertex and the midpoint of each side of each triangle.
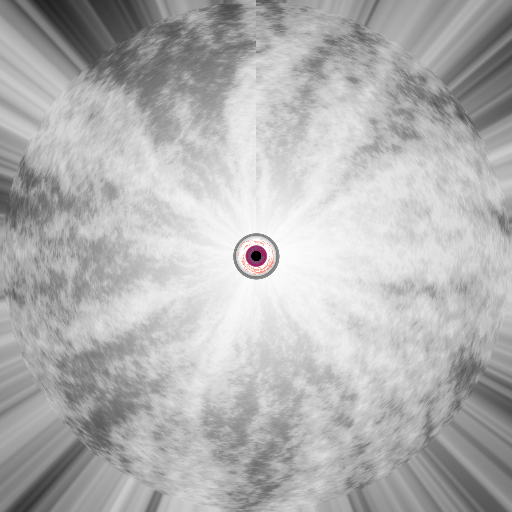
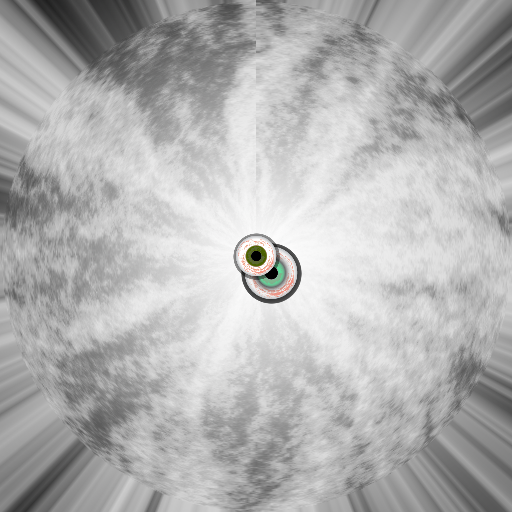
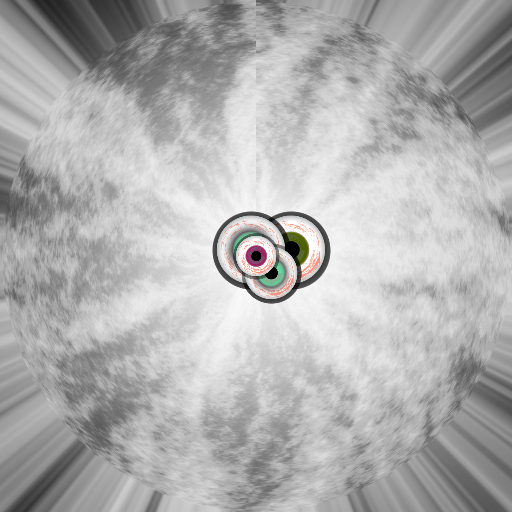
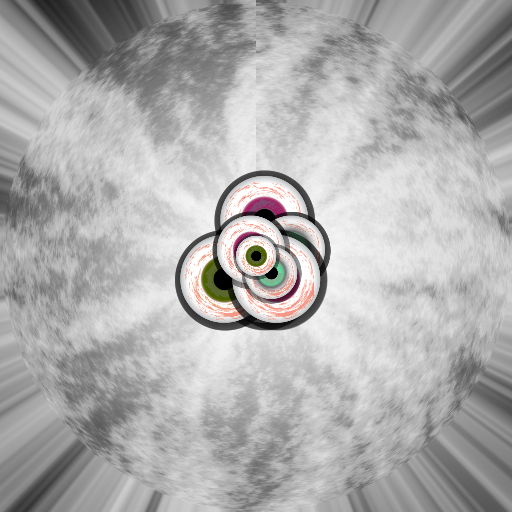
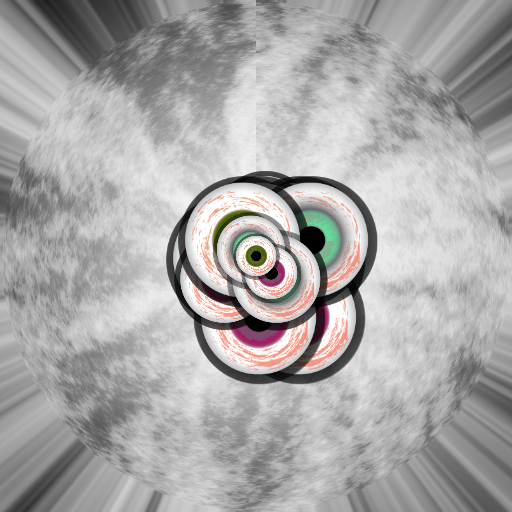
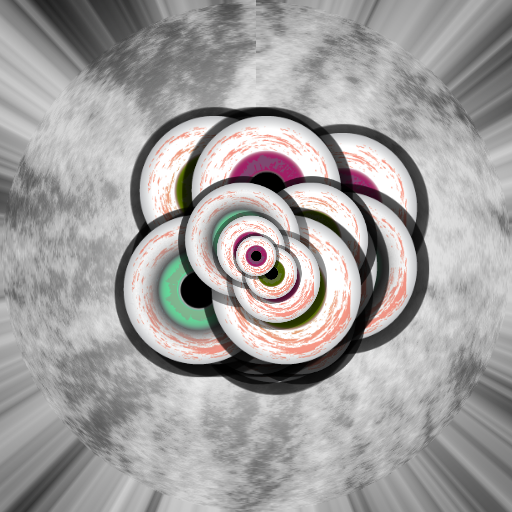
Joe Redmond

My goal was to achieve a seemingly random distribution of eyeballs that grow larger as they are rendered further into the foreground. I call this the "pile of eyeballs." However, the system is governed by a fractal pattern. Each iteration of the eyeball goes through a recursive loop such that the orientation of the next eyeball is shifted to the counter-clockwise direction of any of four directions. The stacks then continue in the opposite direction, and the cycle continues. Each recursive "layer" grows larger by a factor of 1.5.
My goal was to achieve a seemingly random distribution of eyeballs that grow larger as they are rendered further into the foreground. I call this the My goal was to achieve a seemingly random distribution of eyeballs that grow larger as they are rendered further into the foreground. I call this the My goal was to achieve a seemingly random distribution of eyeballs that grow larger as they are rendered further into the foreground. I call this the My goal was to achieve a seemingly random distribution of eyeballs that grow larger as they are rendered further into the foreground. I call this the My goal was to achieve a seemingly random distribution of eyeballs that grow larger as they are rendered further into the foreground. I call this the My goal was to achieve a seemingly random distribution of eyeballs that grow larger as they are rendered further into the foreground. I call this the
Joshua Wang

I wrote my own code to produce the Dragon Curve. It makes a copy of the given curve, then rotates this copy -pi/2 degrees centered at the ending point (or initially the right most point) to produce the next iteration. The only thing I had to look up was the rotation matrix to rotate a point about the origin a given angle, which I got from MAT 203's Problem Set 3, Supplementary Question 1.
I wrote my own code to produce the Dragon Curve. It makes a copy of the given curve, then rotates this copy -pi/2 degrees centered at the ending point (or initially the right most point) to produce the next iteration. The only thing I had to look up was the rotation matrix to rotate a point about the origin a given angle, which I got from MAT 203's Problem Set 3, Supplementary Question 1. I wrote my own code to produce the Dragon Curve. It makes a copy of the given curve, then rotates this copy -pi/2 degrees centered at the ending point (or initially the right most point) to produce the next iteration. The only thing I had to look up was the rotation matrix to rotate a point about the origin a given angle, which I got from MAT 203's Problem Set 3, Supplementary Question 1. I wrote my own code to produce the Dragon Curve. It makes a copy of the given curve, then rotates this copy -pi/2 degrees centered at the ending point (or initially the right most point) to produce the next iteration. The only thing I had to look up was the rotation matrix to rotate a point about the origin a given angle, which I got from MAT 203's Problem Set 3, Supplementary Question 1. I wrote my own code to produce the Dragon Curve. It makes a copy of the given curve, then rotates this copy -pi/2 degrees centered at the ending point (or initially the right most point) to produce the next iteration. The only thing I had to look up was the rotation matrix to rotate a point about the origin a given angle, which I got from MAT 203's Problem Set 3, Supplementary Question 1. I wrote my own code to produce the Dragon Curve. It makes a copy of the given curve, then rotates this copy -pi/2 degrees centered at the ending point (or initially the right most point) to produce the next iteration. The only thing I had to look up was the rotation matrix to rotate a point about the origin a given angle, which I got from MAT 203's Problem Set 3, Supplementary Question 1. I wrote my own code to produce the Dragon Curve. It makes a copy of the given curve, then rotates this copy -pi/2 degrees centered at the ending point (or initially the right most point) to produce the next iteration. The only thing I had to look up was the rotation matrix to rotate a point about the origin a given angle, which I got from MAT 203's Problem Set 3, Supplementary Question 1.
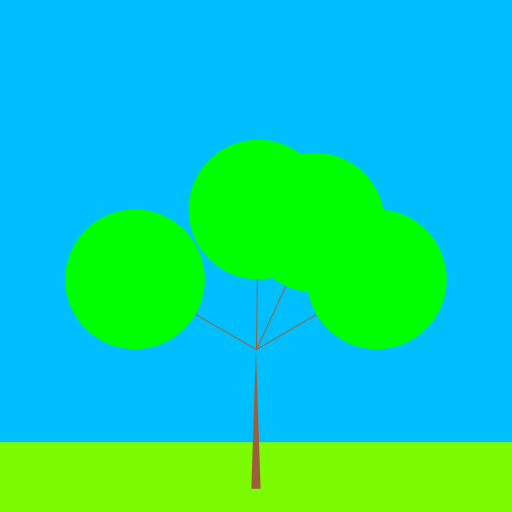
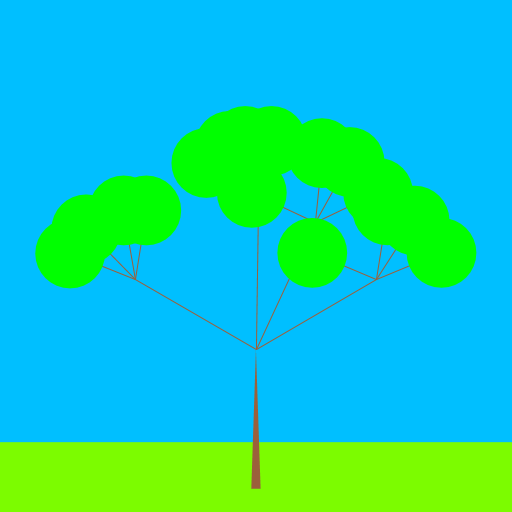
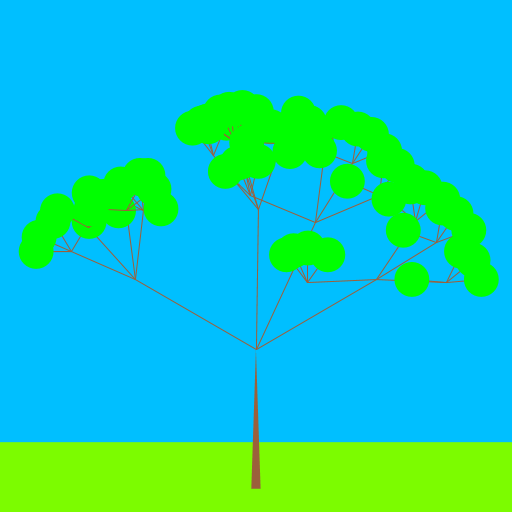
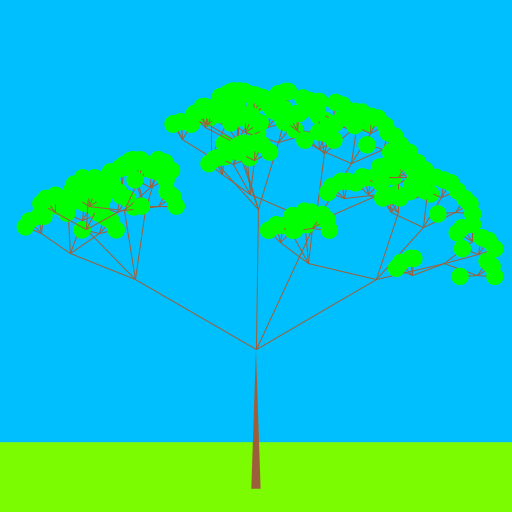
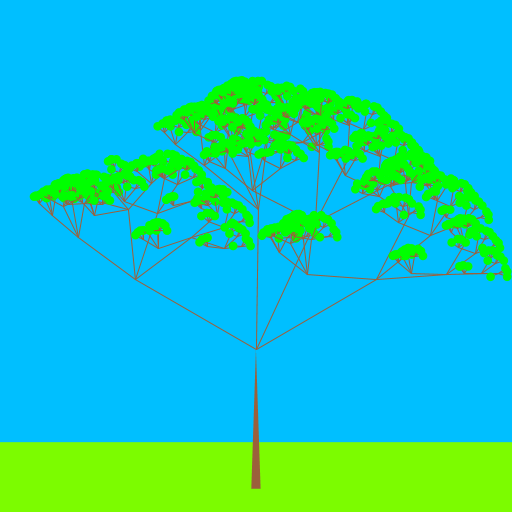
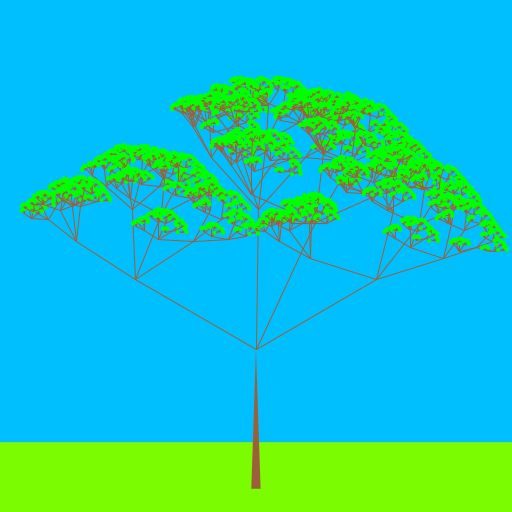
Joshua

I saw a picture of a recursive tree that had the same idea as a Sierpinski triangle. I wanted to create the tree with green leaves, but also make the branches spread RANDOMLY and not by a predictable pattern. So I made a tree that seems to resemble a tree in the Savannas. I added a sky blue background and created a green rectangle as the grass.
I saw a picture of a recursive tree that had the same idea as a Sierpinski triangle. I wanted to create the tree with green leaves, but also make the branches spread RANDOMLY and not by a predictable pattern. So I made a tree that seems to resemble a tree in the Savannas. I added a sky blue background and created a green rectangle as the grass. I saw a picture of a recursive tree that had the same idea as a Sierpinski triangle. I wanted to create the tree with green leaves, but also make the branches spread RANDOMLY and not by a predictable pattern. So I made a tree that seems to resemble a tree in the Savannas. I added a sky blue background and created a green rectangle as the grass. I saw a picture of a recursive tree that had the same idea as a Sierpinski triangle. I wanted to create the tree with green leaves, but also make the branches spread RANDOMLY and not by a predictable pattern. So I made a tree that seems to resemble a tree in the Savannas. I added a sky blue background and created a green rectangle as the grass. I saw a picture of a recursive tree that had the same idea as a Sierpinski triangle. I wanted to create the tree with green leaves, but also make the branches spread RANDOMLY and not by a predictable pattern. So I made a tree that seems to resemble a tree in the Savannas. I added a sky blue background and created a green rectangle as the grass. I saw a picture of a recursive tree that had the same idea as a Sierpinski triangle. I wanted to create the tree with green leaves, but also make the branches spread RANDOMLY and not by a predictable pattern. So I made a tree that seems to resemble a tree in the Savannas. I added a sky blue background and created a green rectangle as the grass. I saw a picture of a recursive tree that had the same idea as a Sierpinski triangle. I wanted to create the tree with green leaves, but also make the branches spread RANDOMLY and not by a predictable pattern. So I made a tree that seems to resemble a tree in the Savannas. I added a sky blue background and created a green rectangle as the grass.
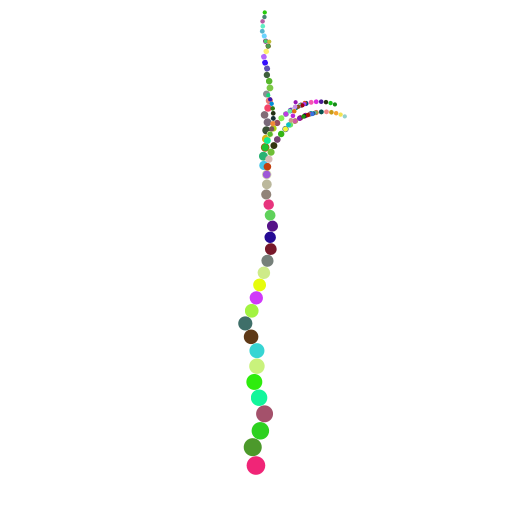
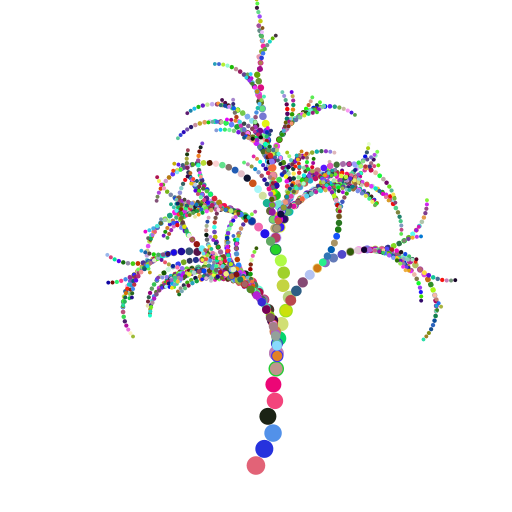
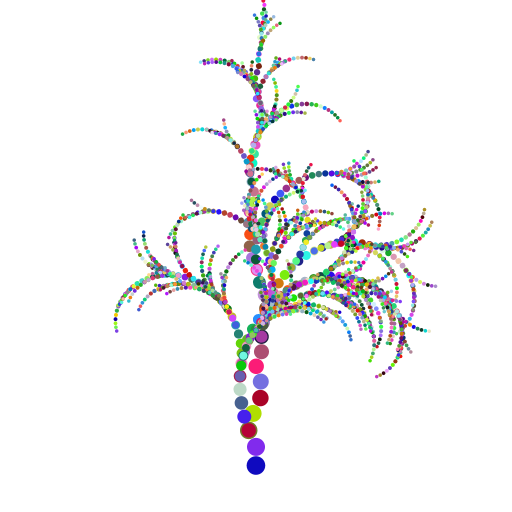
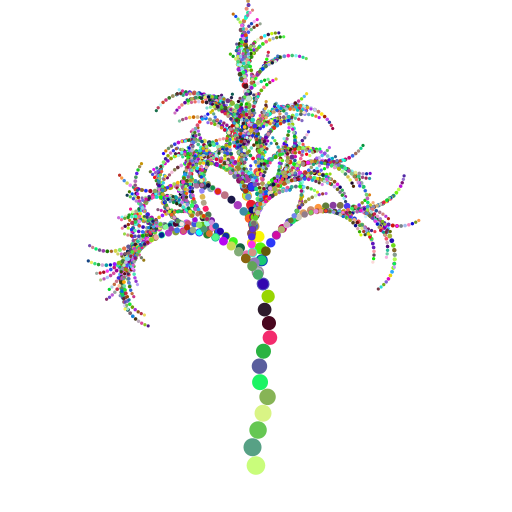
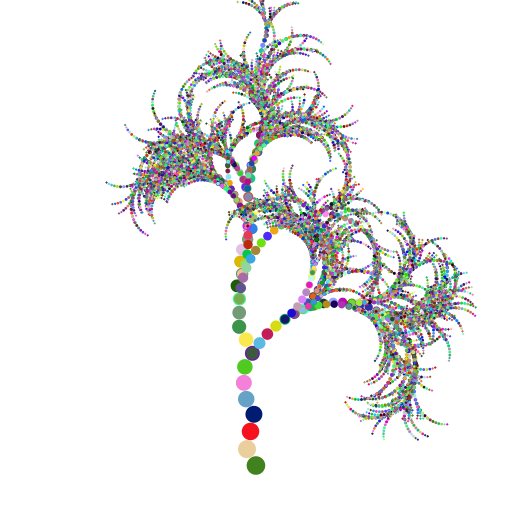
Jonathan Zhang

My program creates a beautiful and colorful tree that may be found in the the likes of a Dr. Seuss book. My inspiration was from the trees in the movie, The Lorax. In order to make the trees seem more natural and less systematic, I included randomness in my program. Each time a new circle is generated, there is a small chance that it will sprout a branch. This chance is related to the radius of the current circle. The larger the radius, the less chance a new branch will be sprouted. This is because in a real tree, branches are not found at the thick trunks, but rather higher up. This allows for a more natural tree, but it also creates the complication that in very rare cases, no branches will sprout and you will be left with an ugly stem of a tree. As such, it is best to run the program multiple times, for various trees!
My program creates a beautiful and colorful tree that may be found in the the likes of a Dr.  Seuss book. My inspiration was from the trees in the movie, The Lorax. In order to make the  trees seem more natural and less systematic, I included randomness in my program. Each time  a new circle is generated, there is a small chance that it will sprout a branch. This chance is related to the radius of the current circle. The larger the radius, the less chance a new branch will be sprouted. This is because in a real tree, branches are not found at the thick trunks, but rather higher up. This allows for a more natural tree, but it also creates the complication that in very rare cases, no branches will sprout and you will be left with an ugly stem of a tree. As such, it is best to run the program multiple times, for various trees! My program creates a beautiful and colorful tree that may be found in the the likes of a Dr.  Seuss book. My inspiration was from the trees in the movie, The Lorax. In order to make the  trees seem more natural and less systematic, I included randomness in my program. Each time  a new circle is generated, there is a small chance that it will sprout a branch. This chance is related to the radius of the current circle. The larger the radius, the less chance a new branch will be sprouted. This is because in a real tree, branches are not found at the thick trunks, but rather higher up. This allows for a more natural tree, but it also creates the complication that in very rare cases, no branches will sprout and you will be left with an ugly stem of a tree. As such, it is best to run the program multiple times, for various trees! My program creates a beautiful and colorful tree that may be found in the the likes of a Dr.  Seuss book. My inspiration was from the trees in the movie, The Lorax. In order to make the  trees seem more natural and less systematic, I included randomness in my program. Each time  a new circle is generated, there is a small chance that it will sprout a branch. This chance is related to the radius of the current circle. The larger the radius, the less chance a new branch will be sprouted. This is because in a real tree, branches are not found at the thick trunks, but rather higher up. This allows for a more natural tree, but it also creates the complication that in very rare cases, no branches will sprout and you will be left with an ugly stem of a tree. As such, it is best to run the program multiple times, for various trees! My program creates a beautiful and colorful tree that may be found in the the likes of a Dr.  Seuss book. My inspiration was from the trees in the movie, The Lorax. In order to make the  trees seem more natural and less systematic, I included randomness in my program. Each time  a new circle is generated, there is a small chance that it will sprout a branch. This chance is related to the radius of the current circle. The larger the radius, the less chance a new branch will be sprouted. This is because in a real tree, branches are not found at the thick trunks, but rather higher up. This allows for a more natural tree, but it also creates the complication that in very rare cases, no branches will sprout and you will be left with an ugly stem of a tree. As such, it is best to run the program multiple times, for various trees! My program creates a beautiful and colorful tree that may be found in the the likes of a Dr.  Seuss book. My inspiration was from the trees in the movie, The Lorax. In order to make the  trees seem more natural and less systematic, I included randomness in my program. Each time  a new circle is generated, there is a small chance that it will sprout a branch. This chance is related to the radius of the current circle. The larger the radius, the less chance a new branch will be sprouted. This is because in a real tree, branches are not found at the thick trunks, but rather higher up. This allows for a more natural tree, but it also creates the complication that in very rare cases, no branches will sprout and you will be left with an ugly stem of a tree. As such, it is best to run the program multiple times, for various trees! My program creates a beautiful and colorful tree that may be found in the the likes of a Dr.  Seuss book. My inspiration was from the trees in the movie, The Lorax. In order to make the  trees seem more natural and less systematic, I included randomness in my program. Each time  a new circle is generated, there is a small chance that it will sprout a branch. This chance is related to the radius of the current circle. The larger the radius, the less chance a new branch will be sprouted. This is because in a real tree, branches are not found at the thick trunks, but rather higher up. This allows for a more natural tree, but it also creates the complication that in very rare cases, no branches will sprout and you will be left with an ugly stem of a tree. As such, it is best to run the program multiple times, for various trees!
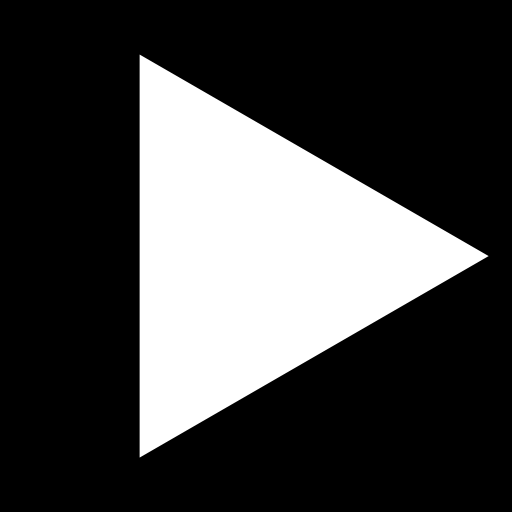
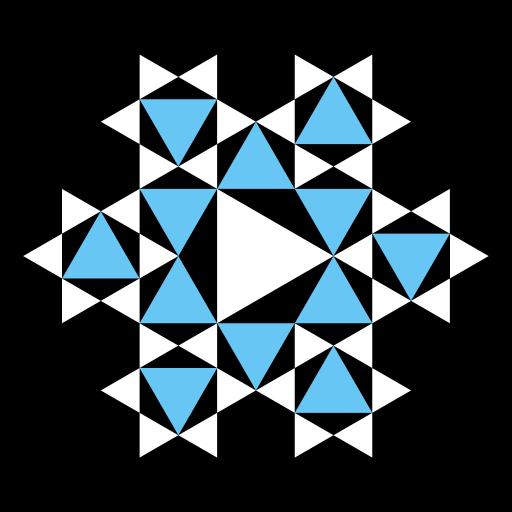
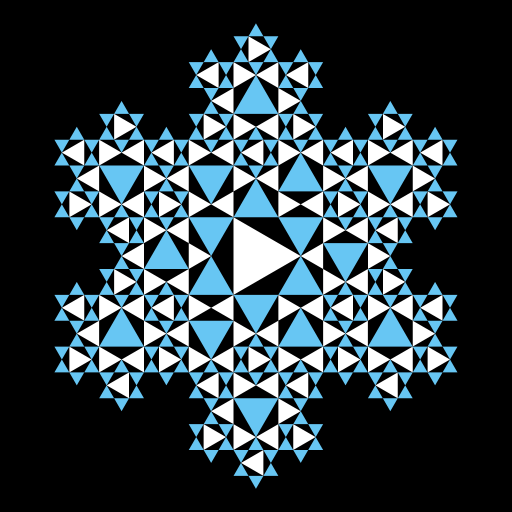
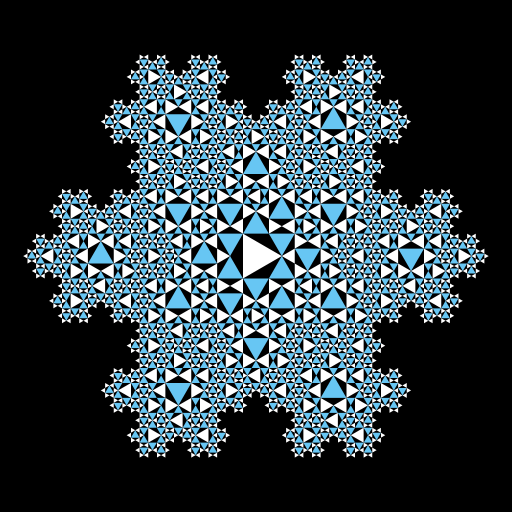
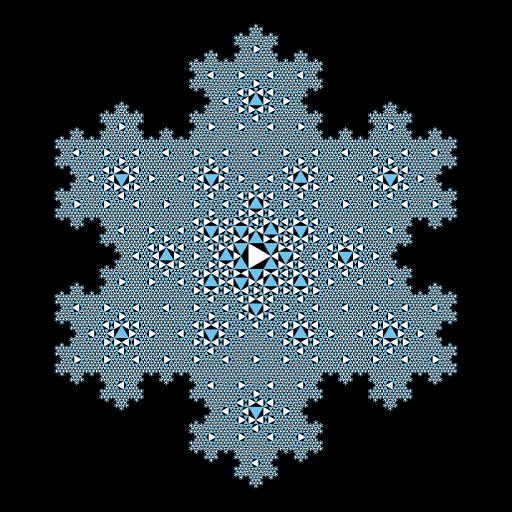
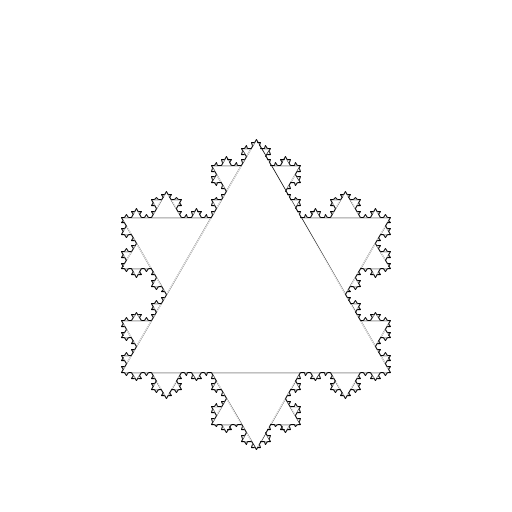
Kevin Sun

I wanted to create a Koch snowflake that could be broken down into smaller Koch snowflakes. A picture at the bottom of this page: http://mathworld.wolfram.com/KochSnowflake.html caught my attention, so I decided to make a koch snowflake that consists of many filled equilateral triangles rotated in different directions. If you trace the outline of each drawing, you will get a koch snowflake. The interesting thing about this program is that it makes snowflakes of recursive order n by drawing a snowflake of order n-1 in the center and placing six smaller snowflakes of order n-1 around the central snowflake. After writing the code, I changed the color scheme to make the drawing look more appealing.
I wanted to create a Koch snowflake that could be broken down into smaller Koch snowflakes. A picture at the bottom of this page: http://mathworld.wolfram.com/KochSnowflake.html caught my attention, so I decided to make a koch snowflake that consists of many filled equilateral triangles rotated in different directions. If you trace the outline of each drawing, you will get a koch snowflake. The interesting thing about this program is that it makes snowflakes of recursive order n by drawing a snowflake of order n-1 in the center and placing six smaller snowflakes of order n-1 around the central snowflake.  After writing the code, I changed the color scheme to make the drawing look more appealing. I wanted to create a Koch snowflake that could be broken down into smaller Koch snowflakes. A picture at the bottom of this page: http://mathworld.wolfram.com/KochSnowflake.html caught my attention, so I decided to make a koch snowflake that consists of many filled equilateral triangles rotated in different directions. If you trace the outline of each drawing, you will get a koch snowflake. The interesting thing about this program is that it makes snowflakes of recursive order n by drawing a snowflake of order n-1 in the center and placing six smaller snowflakes of order n-1 around the central snowflake.  After writing the code, I changed the color scheme to make the drawing look more appealing. I wanted to create a Koch snowflake that could be broken down into smaller Koch snowflakes. A picture at the bottom of this page: http://mathworld.wolfram.com/KochSnowflake.html caught my attention, so I decided to make a koch snowflake that consists of many filled equilateral triangles rotated in different directions. If you trace the outline of each drawing, you will get a koch snowflake. The interesting thing about this program is that it makes snowflakes of recursive order n by drawing a snowflake of order n-1 in the center and placing six smaller snowflakes of order n-1 around the central snowflake.  After writing the code, I changed the color scheme to make the drawing look more appealing. I wanted to create a Koch snowflake that could be broken down into smaller Koch snowflakes. A picture at the bottom of this page: http://mathworld.wolfram.com/KochSnowflake.html caught my attention, so I decided to make a koch snowflake that consists of many filled equilateral triangles rotated in different directions. If you trace the outline of each drawing, you will get a koch snowflake. The interesting thing about this program is that it makes snowflakes of recursive order n by drawing a snowflake of order n-1 in the center and placing six smaller snowflakes of order n-1 around the central snowflake.  After writing the code, I changed the color scheme to make the drawing look more appealing. I wanted to create a Koch snowflake that could be broken down into smaller Koch snowflakes. A picture at the bottom of this page: http://mathworld.wolfram.com/KochSnowflake.html caught my attention, so I decided to make a koch snowflake that consists of many filled equilateral triangles rotated in different directions. If you trace the outline of each drawing, you will get a koch snowflake. The interesting thing about this program is that it makes snowflakes of recursive order n by drawing a snowflake of order n-1 in the center and placing six smaller snowflakes of order n-1 around the central snowflake.  After writing the code, I changed the color scheme to make the drawing look more appealing. I wanted to create a Koch snowflake that could be broken down into smaller Koch snowflakes. A picture at the bottom of this page: http://mathworld.wolfram.com/KochSnowflake.html caught my attention, so I decided to make a koch snowflake that consists of many filled equilateral triangles rotated in different directions. If you trace the outline of each drawing, you will get a koch snowflake. The interesting thing about this program is that it makes snowflakes of recursive order n by drawing a snowflake of order n-1 in the center and placing six smaller snowflakes of order n-1 around the central snowflake.  After writing the code, I changed the color scheme to make the drawing look more appealing.
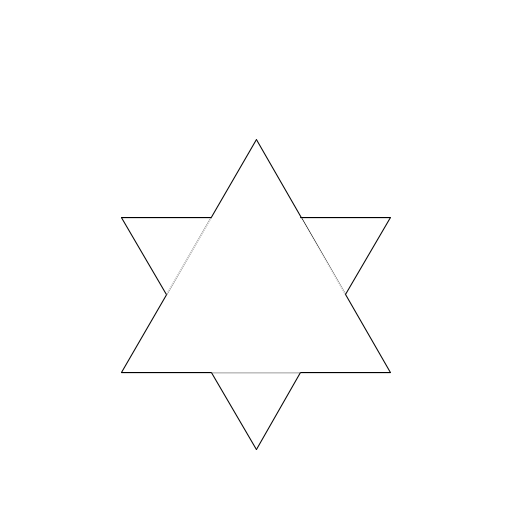
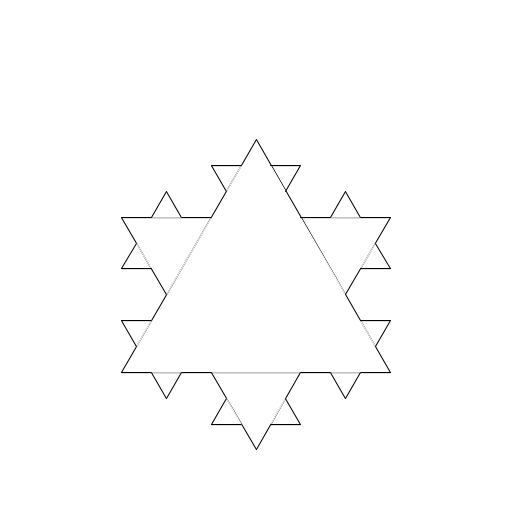
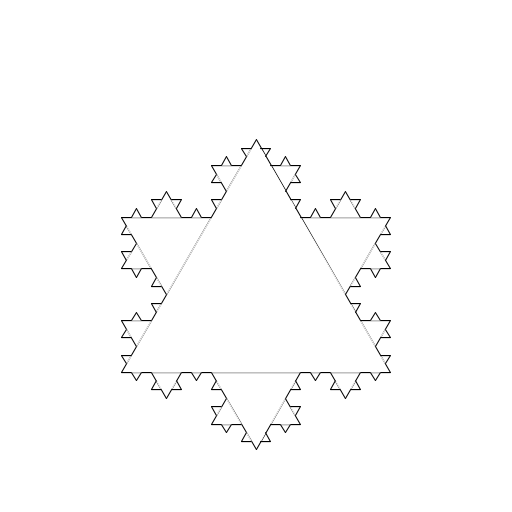
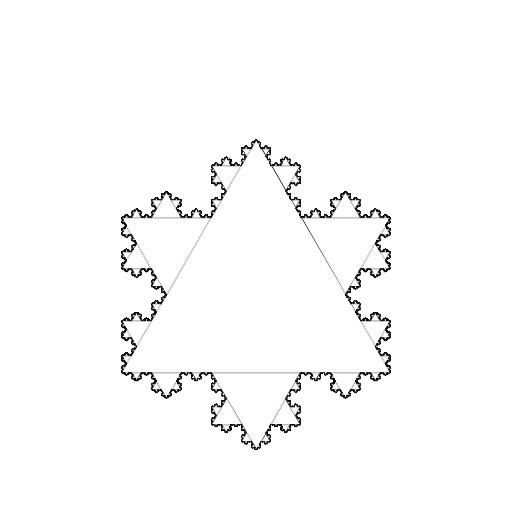
Nicholas Yang

My recursive drawing was Koch's snowflake. Successive iterations of Koch's snowflake are created by replacing the center of each side with an equilateral triangle. As the order grows, the design begins to look like a more and more intricate snowflake.
My recursive drawing was Koch's snowflake. Successive iterations of Koch's snowflake are created by replacing the center of each side with an equilateral triangle. As the order grows, the design begins to look like a more and more intricate snowflake. My recursive drawing was Koch's snowflake. Successive iterations of Koch's snowflake are created by replacing the center of each side with an equilateral triangle. As the order grows, the design begins to look like a more and more intricate snowflake. My recursive drawing was Koch's snowflake. Successive iterations of Koch's snowflake are created by replacing the center of each side with an equilateral triangle. As the order grows, the design begins to look like a more and more intricate snowflake. My recursive drawing was Koch's snowflake. Successive iterations of Koch's snowflake are created by replacing the center of each side with an equilateral triangle. As the order grows, the design begins to look like a more and more intricate snowflake. My recursive drawing was Koch's snowflake. Successive iterations of Koch's snowflake are created by replacing the center of each side with an equilateral triangle. As the order grows, the design begins to look like a more and more intricate snowflake. My recursive drawing was Koch's snowflake. Successive iterations of Koch's snowflake are created by replacing the center of each side with an equilateral triangle. As the order grows, the design begins to look like a more and more intricate snowflake.
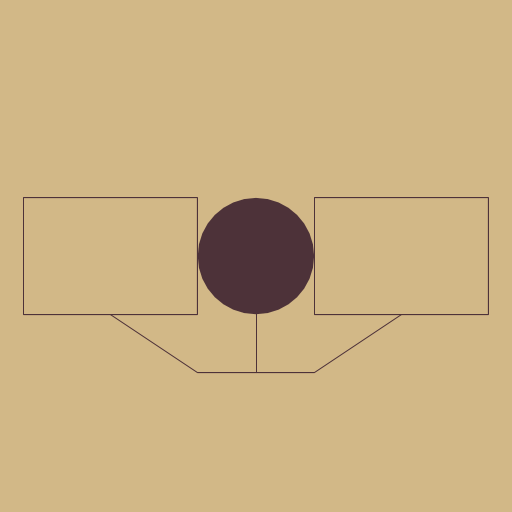
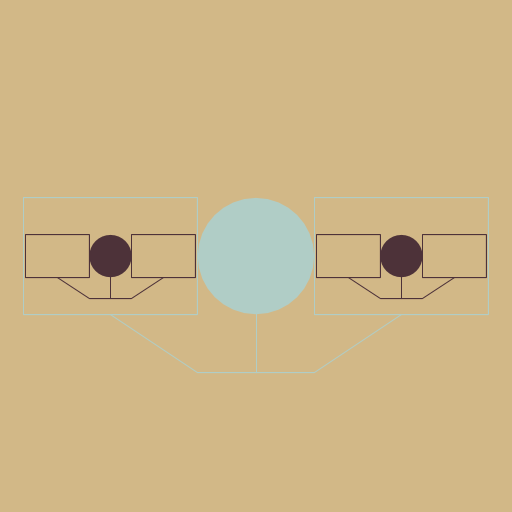
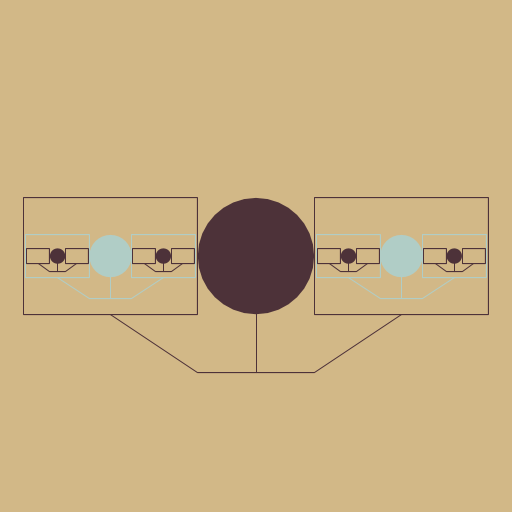
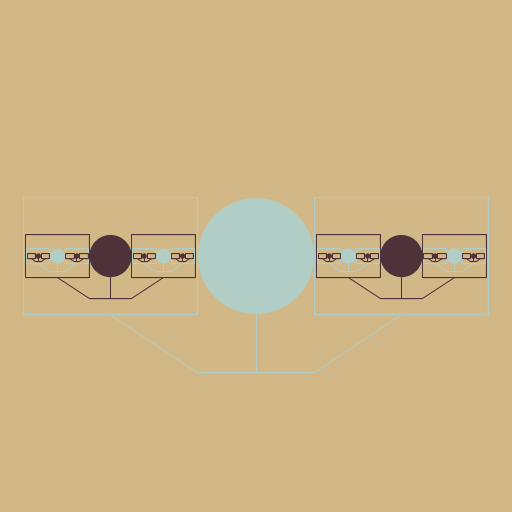
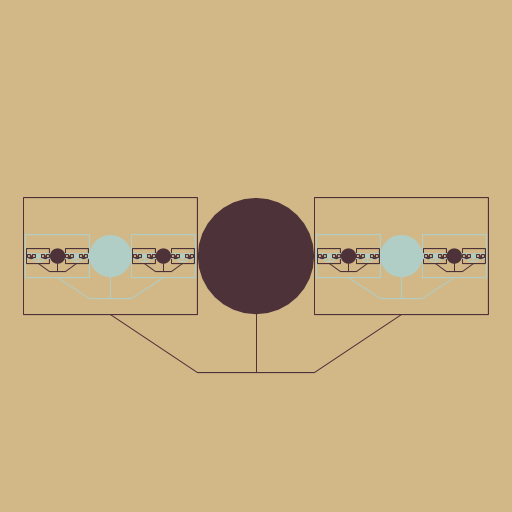
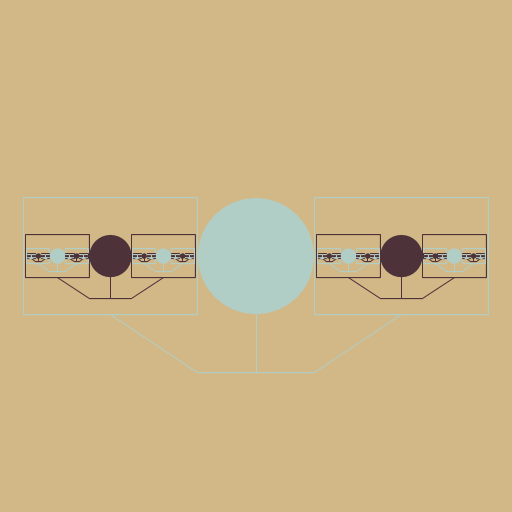
Justin Otor

I made a picture of a person holding two pictures, each containing a picture of a person holding two pictures, and so on. The color of the person and picture switches with each layer, as well. I was inspired by images like ESPN the Magazine`s "Revenge of the Jocks" series of covers. I did not use images from the web because I thought it would be more organic.
I made a picture of a person holding two pictures, each containing a picture of a person holding two pictures, and so on. The color of the person and  picture switches with each layer, as well. I was inspired by images like ESPN the Magazine`s I made a picture of a person holding two pictures, each containing a picture of a person holding two pictures, and so on. The color of the person and  picture switches with each layer, as well. I was inspired by images like ESPN the Magazine`s I made a picture of a person holding two pictures, each containing a picture of a person holding two pictures, and so on. The color of the person and  picture switches with each layer, as well. I was inspired by images like ESPN the Magazine`s I made a picture of a person holding two pictures, each containing a picture of a person holding two pictures, and so on. The color of the person and  picture switches with each layer, as well. I was inspired by images like ESPN the Magazine`s I made a picture of a person holding two pictures, each containing a picture of a person holding two pictures, and so on. The color of the person and  picture switches with each layer, as well. I was inspired by images like ESPN the Magazine`s I made a picture of a person holding two pictures, each containing a picture of a person holding two pictures, and so on. The color of the person and  picture switches with each layer, as well. I was inspired by images like ESPN the Magazine`s
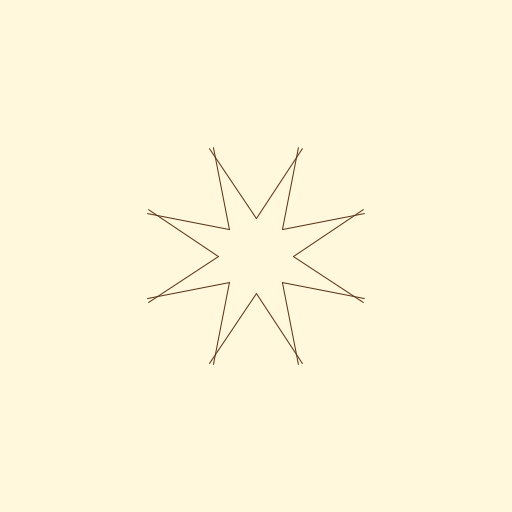
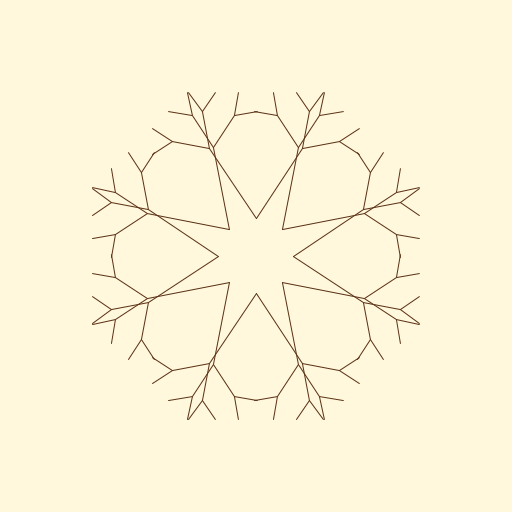
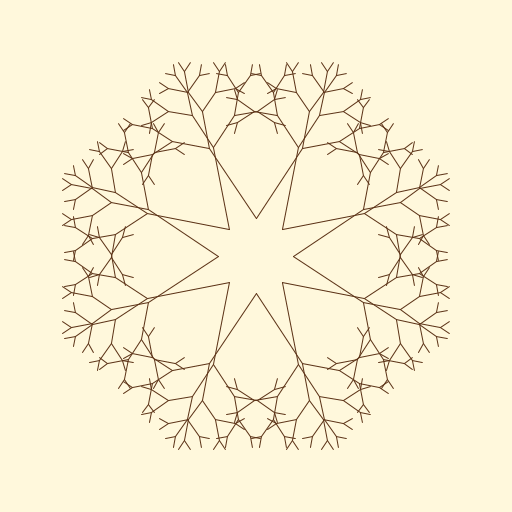
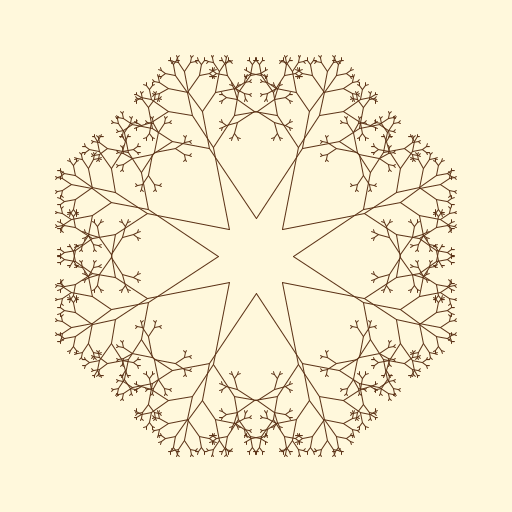
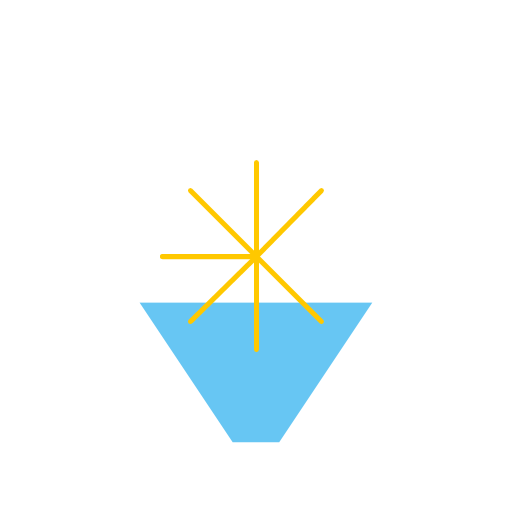
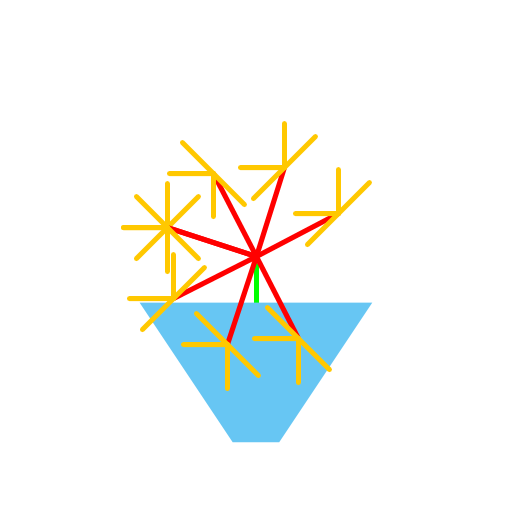
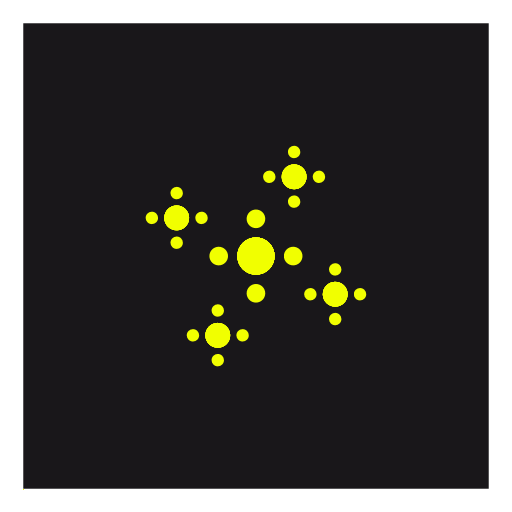
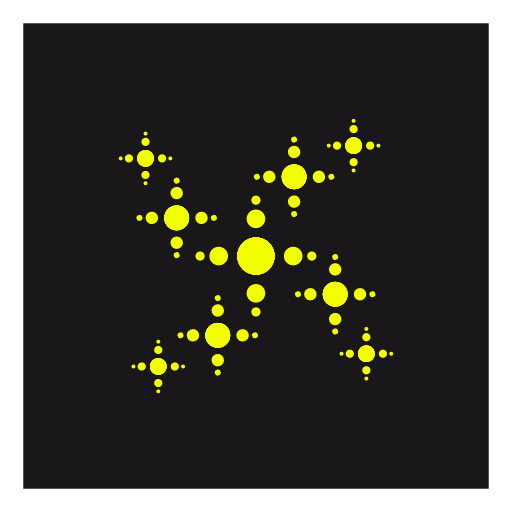
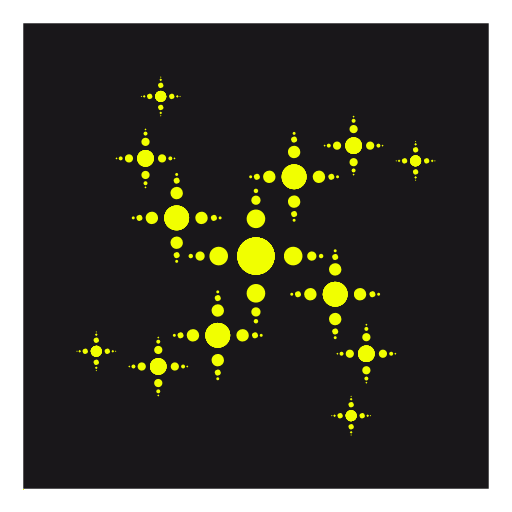
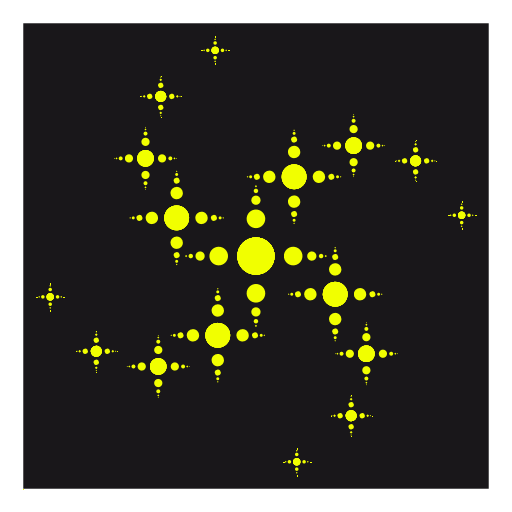
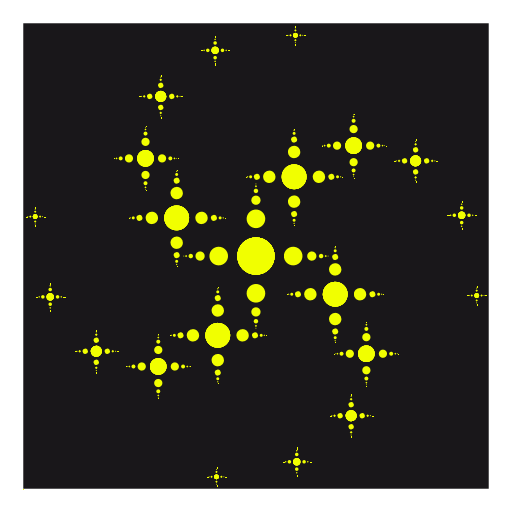
Patrick Zeng

I wanted to create a recursive spiral. I ended up having to simplify the complexity of my original intentions (and, consequentially, my recursive structure) a lot, and ended up settling with a starlike spiral design. The program itself in essence uses two sets of recursions, one for the main stars and one for their surrounding sparks. I discovered the hard way that these two sets must be independent of one another to avoid creating a gigantic mess.
I wanted to create a recursive spiral. I ended up having to simplify the complexity of my original intentions (and, consequentially, my recursive structure) a lot, and ended up settling with a starlike spiral design. The program itself in essence uses two sets of recursions, one for the main stars and one for their surrounding sparks. I discovered the hard way that these two sets must be independent of one another to avoid creating a gigantic mess. I wanted to create a recursive spiral. I ended up having to simplify the complexity of my original intentions (and, consequentially, my recursive structure) a lot, and ended up settling with a starlike spiral design. The program itself in essence uses two sets of recursions, one for the main stars and one for their surrounding sparks. I discovered the hard way that these two sets must be independent of one another to avoid creating a gigantic mess. I wanted to create a recursive spiral. I ended up having to simplify the complexity of my original intentions (and, consequentially, my recursive structure) a lot, and ended up settling with a starlike spiral design. The program itself in essence uses two sets of recursions, one for the main stars and one for their surrounding sparks. I discovered the hard way that these two sets must be independent of one another to avoid creating a gigantic mess. I wanted to create a recursive spiral. I ended up having to simplify the complexity of my original intentions (and, consequentially, my recursive structure) a lot, and ended up settling with a starlike spiral design. The program itself in essence uses two sets of recursions, one for the main stars and one for their surrounding sparks. I discovered the hard way that these two sets must be independent of one another to avoid creating a gigantic mess. I wanted to create a recursive spiral. I ended up having to simplify the complexity of my original intentions (and, consequentially, my recursive structure) a lot, and ended up settling with a starlike spiral design. The program itself in essence uses two sets of recursions, one for the main stars and one for their surrounding sparks. I discovered the hard way that these two sets must be independent of one another to avoid creating a gigantic mess. I wanted to create a recursive spiral. I ended up having to simplify the complexity of my original intentions (and, consequentially, my recursive structure) a lot, and ended up settling with a starlike spiral design. The program itself in essence uses two sets of recursions, one for the main stars and one for their surrounding sparks. I discovered the hard way that these two sets must be independent of one another to avoid creating a gigantic mess.
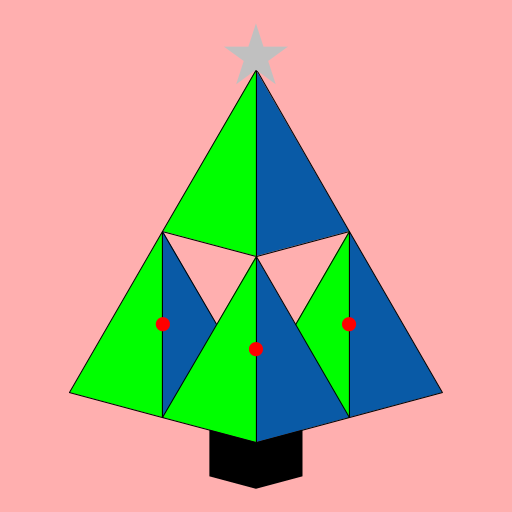
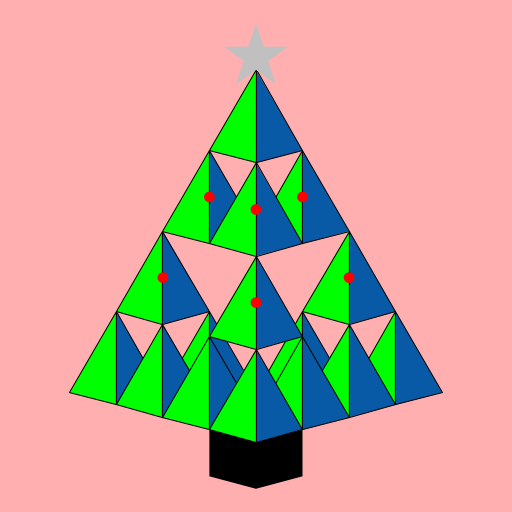
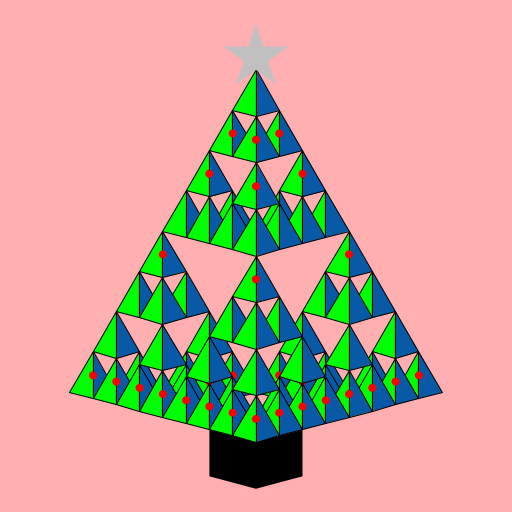
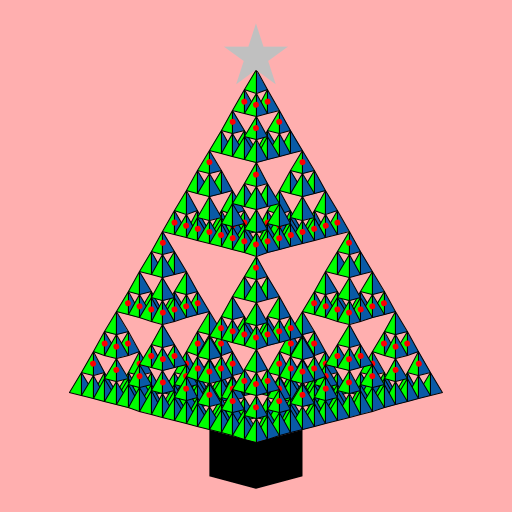
Ren Song

I found a lot of 3D patterns and so I decided to go for 3D Sierpinski pyramids. When that part was finished, I thought it looked like a Christmas tree. And so I went on to add the tree trunck and alternating lights and star.
I found a lot of 3D patterns and  so I decided to go for 3D Sierpinski pyramids. When that part was finished, I thought it looked like a Christmas tree. And so I went on to add the tree trunck and alternating lights and star. I found a lot of 3D patterns and  so I decided to go for 3D Sierpinski pyramids. When that part was finished, I thought it looked like a Christmas tree. And so I went on to add the tree trunck and alternating lights and star. I found a lot of 3D patterns and  so I decided to go for 3D Sierpinski pyramids. When that part was finished, I thought it looked like a Christmas tree. And so I went on to add the tree trunck and alternating lights and star. I found a lot of 3D patterns and  so I decided to go for 3D Sierpinski pyramids. When that part was finished, I thought it looked like a Christmas tree. And so I went on to add the tree trunck and alternating lights and star. I found a lot of 3D patterns and  so I decided to go for 3D Sierpinski pyramids. When that part was finished, I thought it looked like a Christmas tree. And so I went on to add the tree trunck and alternating lights and star. I found a lot of 3D patterns and  so I decided to go for 3D Sierpinski pyramids. When that part was finished, I thought it looked like a Christmas tree. And so I went on to add the tree trunck and alternating lights and star.
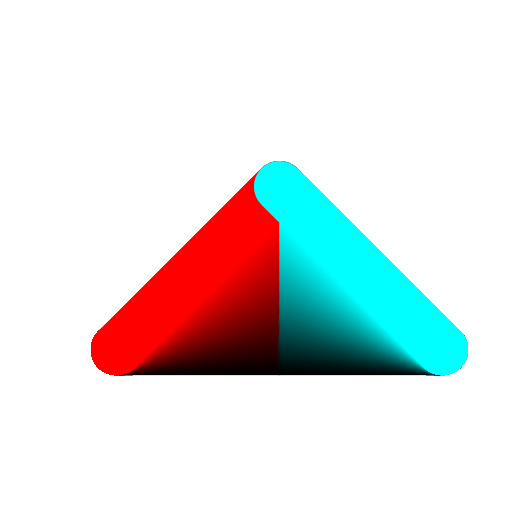
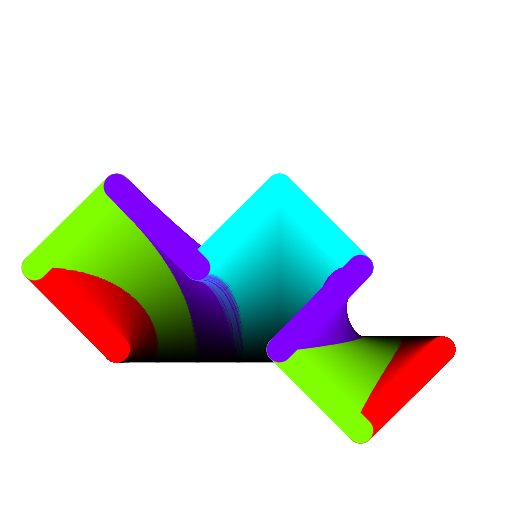
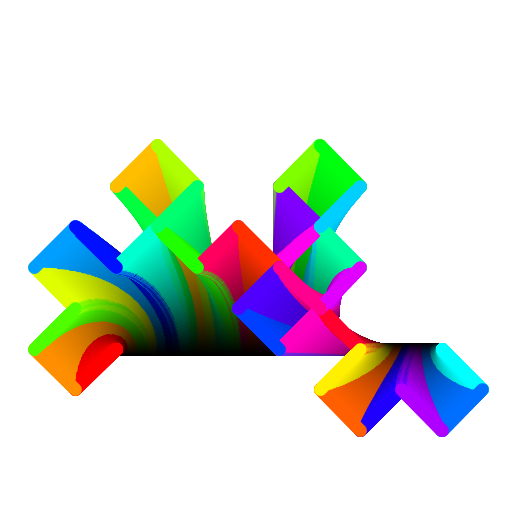
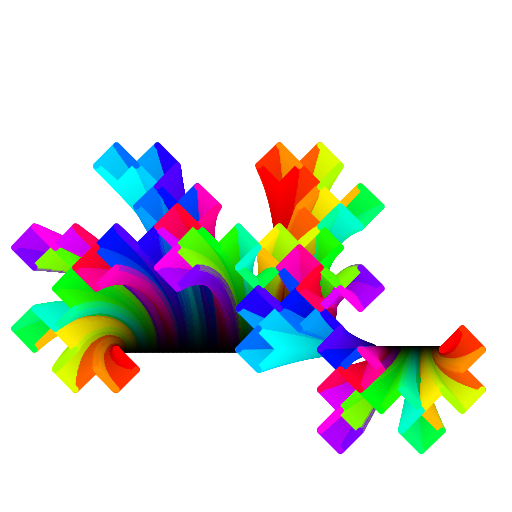
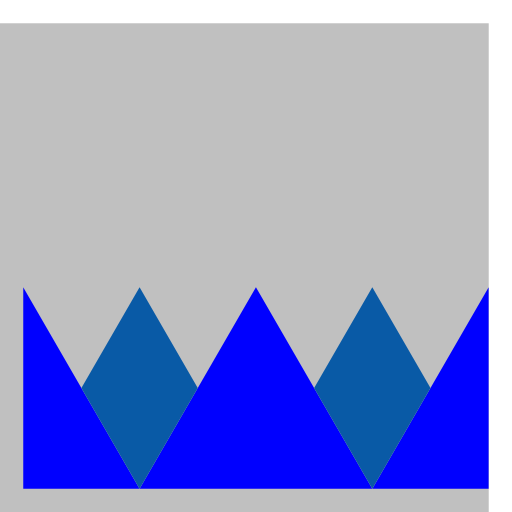
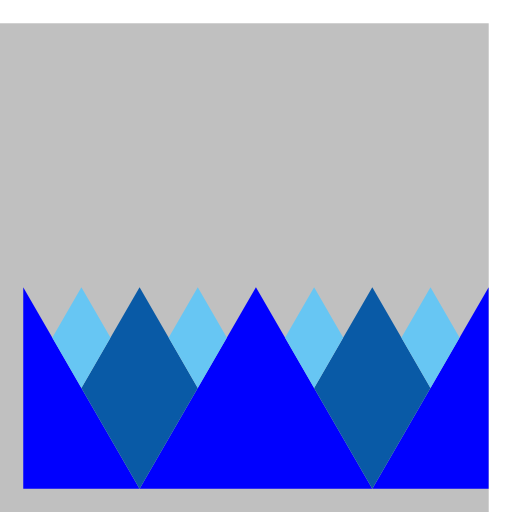
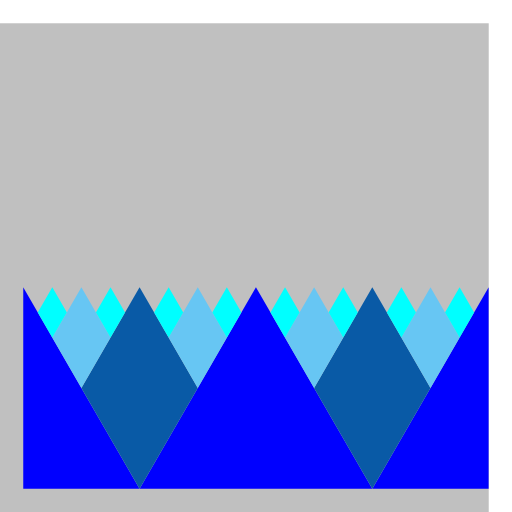
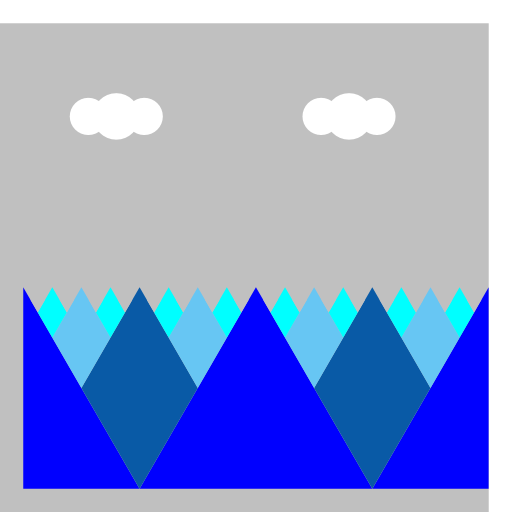
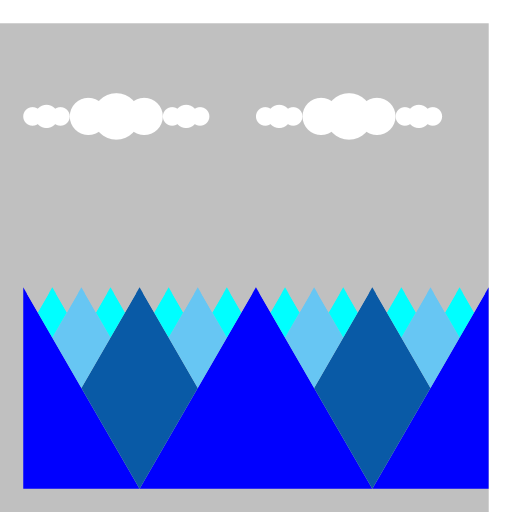
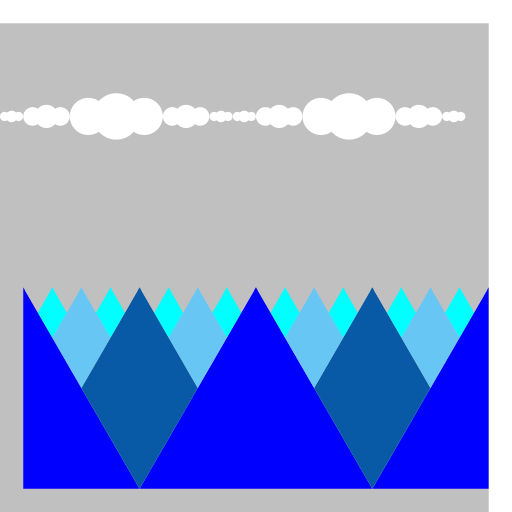
Susannah Crowell

My Art.java draws a mountain range up to an N-level of 3, then draws clouds in the sky above the range (the mountains keep going, but as the same color as the sky, so that this could easily be changed to show more mountains in lighter colors). I built off the structure of Sierpinski and NestedCircles. Clouds are only drawn after the mountains were drawn. The main method draws triangle mountains, but the subsequent methods are diamonds, while the clouds are overlapping white circles.
My Art.java draws a mountain range up to an N-level of 3, then draws clouds in the sky above the range (the mountains keep going, but as the same color as the sky, so that this could easily be changed to show more mountains in lighter colors). I built off the structure of Sierpinski and NestedCircles. Clouds are only drawn after the mountains were drawn. The main method draws triangle mountains, but the subsequent methods are diamonds, while the clouds are overlapping white circles. My Art.java draws a mountain range up to an N-level of 3, then draws clouds in the sky above the range (the mountains keep going, but as the same color as the sky, so that this could easily be changed to show more mountains in lighter colors). I built off the structure of Sierpinski and NestedCircles. Clouds are only drawn after the mountains were drawn. The main method draws triangle mountains, but the subsequent methods are diamonds, while the clouds are overlapping white circles. My Art.java draws a mountain range up to an N-level of 3, then draws clouds in the sky above the range (the mountains keep going, but as the same color as the sky, so that this could easily be changed to show more mountains in lighter colors). I built off the structure of Sierpinski and NestedCircles. Clouds are only drawn after the mountains were drawn. The main method draws triangle mountains, but the subsequent methods are diamonds, while the clouds are overlapping white circles. My Art.java draws a mountain range up to an N-level of 3, then draws clouds in the sky above the range (the mountains keep going, but as the same color as the sky, so that this could easily be changed to show more mountains in lighter colors). I built off the structure of Sierpinski and NestedCircles. Clouds are only drawn after the mountains were drawn. The main method draws triangle mountains, but the subsequent methods are diamonds, while the clouds are overlapping white circles. My Art.java draws a mountain range up to an N-level of 3, then draws clouds in the sky above the range (the mountains keep going, but as the same color as the sky, so that this could easily be changed to show more mountains in lighter colors). I built off the structure of Sierpinski and NestedCircles. Clouds are only drawn after the mountains were drawn. The main method draws triangle mountains, but the subsequent methods are diamonds, while the clouds are overlapping white circles. My Art.java draws a mountain range up to an N-level of 3, then draws clouds in the sky above the range (the mountains keep going, but as the same color as the sky, so that this could easily be changed to show more mountains in lighter colors). I built off the structure of Sierpinski and NestedCircles. Clouds are only drawn after the mountains were drawn. The main method draws triangle mountains, but the subsequent methods are diamonds, while the clouds are overlapping white circles.
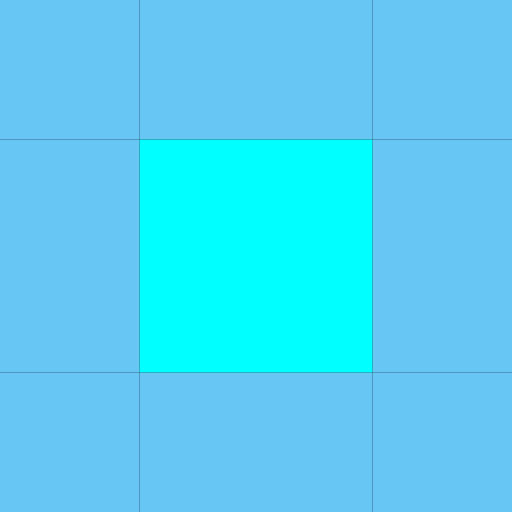
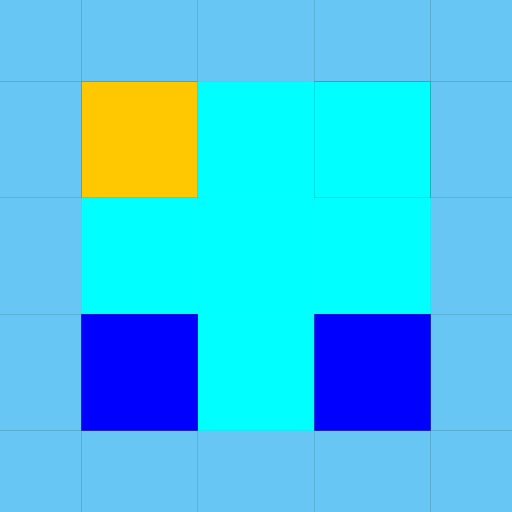
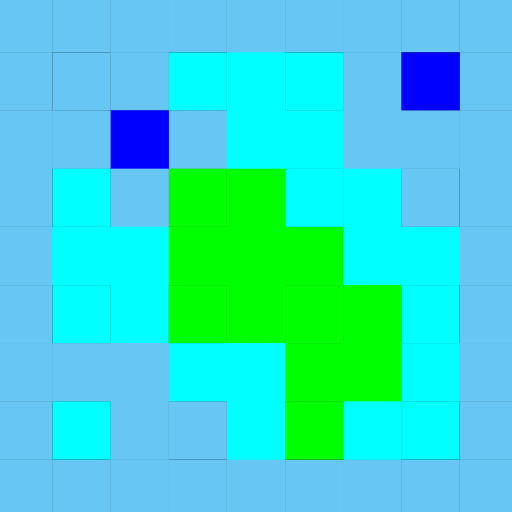
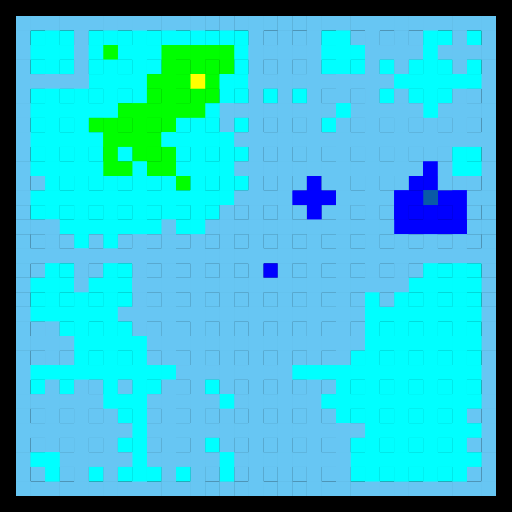
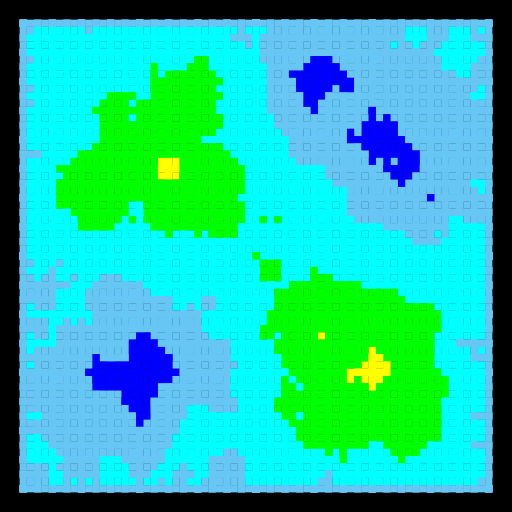
Stewart Scott

I started by making a random 3D terrain generator but StdDraw3D is not allowed for this assignment, so I just took the same code to make a 2D random terrain generator. The recursion at the heart of it is a modified version of plasma cloud generator. The randomness comes from the Brownian Bridge code. The color of each square corresponds to the typical colors used on a map to denote elevation and breaks the third coordinate (default at 0-1) into ten segments divided by these colors. This 2D version essentially draws a paper map of what that 3D environment would've looked like. You could change the color function to make a cloud too.
I started by making a random 3D terrain generator but StdDraw3D is not allowed for this assignment, so I just took the same code to make a 2D random terrain generator. The recursion at the heart of it is a modified version of plasma cloud generator. The randomness comes from the Brownian Bridge code. The color of each square corresponds to the typical colors used on a map to denote elevation and breaks the third coordinate (default at 0-1) into ten segments divided by these colors. This 2D version essentially draws a paper map of what that 3D environment would've looked like. You could change the color function to make a cloud too. I started by making a random 3D terrain generator but StdDraw3D is not allowed for this assignment, so I just took the same code to make a 2D random terrain generator. The recursion at the heart of it is a modified version of plasma cloud generator. The randomness comes from the Brownian Bridge code. The color of each square corresponds to the typical colors used on a map to denote elevation and breaks the third coordinate (default at 0-1) into ten segments divided by these colors. This 2D version essentially draws a paper map of what that 3D environment would've looked like. You could change the color function to make a cloud too. I started by making a random 3D terrain generator but StdDraw3D is not allowed for this assignment, so I just took the same code to make a 2D random terrain generator. The recursion at the heart of it is a modified version of plasma cloud generator. The randomness comes from the Brownian Bridge code. The color of each square corresponds to the typical colors used on a map to denote elevation and breaks the third coordinate (default at 0-1) into ten segments divided by these colors. This 2D version essentially draws a paper map of what that 3D environment would've looked like. You could change the color function to make a cloud too. I started by making a random 3D terrain generator but StdDraw3D is not allowed for this assignment, so I just took the same code to make a 2D random terrain generator. The recursion at the heart of it is a modified version of plasma cloud generator. The randomness comes from the Brownian Bridge code. The color of each square corresponds to the typical colors used on a map to denote elevation and breaks the third coordinate (default at 0-1) into ten segments divided by these colors. This 2D version essentially draws a paper map of what that 3D environment would've looked like. You could change the color function to make a cloud too. I started by making a random 3D terrain generator but StdDraw3D is not allowed for this assignment, so I just took the same code to make a 2D random terrain generator. The recursion at the heart of it is a modified version of plasma cloud generator. The randomness comes from the Brownian Bridge code. The color of each square corresponds to the typical colors used on a map to denote elevation and breaks the third coordinate (default at 0-1) into ten segments divided by these colors. This 2D version essentially draws a paper map of what that 3D environment would've looked like. You could change the color function to make a cloud too. I started by making a random 3D terrain generator but StdDraw3D is not allowed for this assignment, so I just took the same code to make a 2D random terrain generator. The recursion at the heart of it is a modified version of plasma cloud generator. The randomness comes from the Brownian Bridge code. The color of each square corresponds to the typical colors used on a map to denote elevation and breaks the third coordinate (default at 0-1) into ten segments divided by these colors. This 2D version essentially draws a paper map of what that 3D environment would've looked like. You could change the color function to make a cloud too.
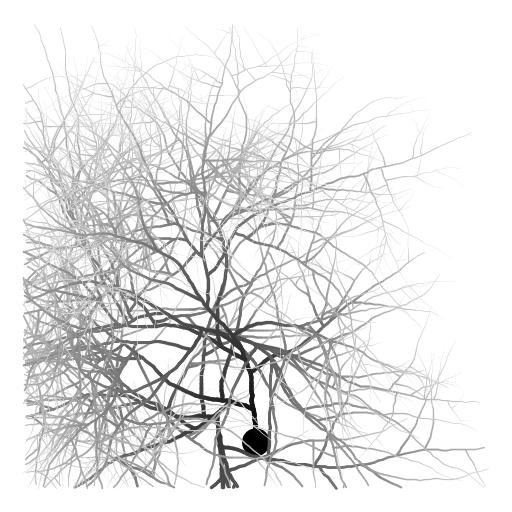
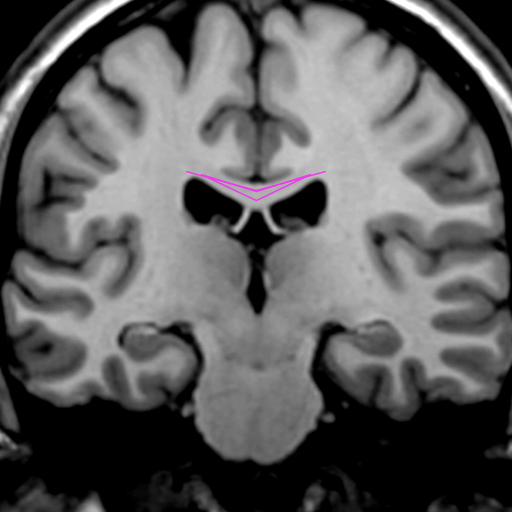
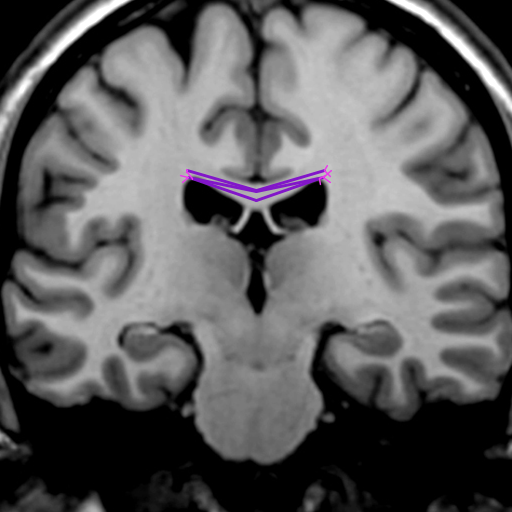
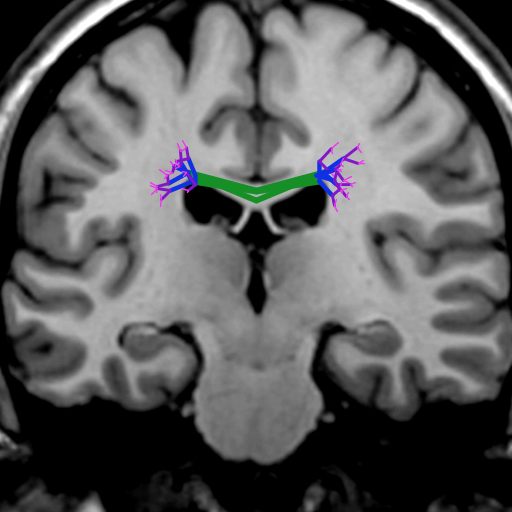
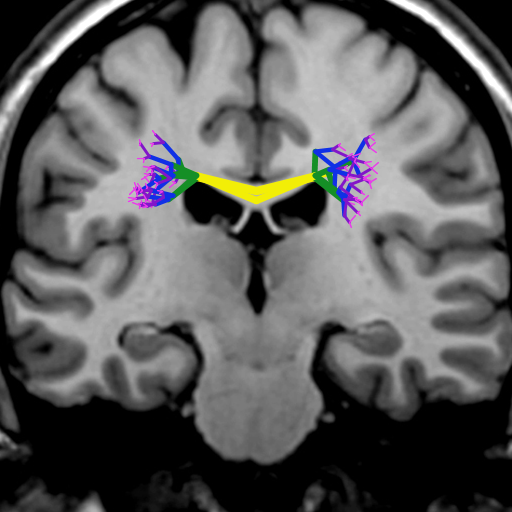
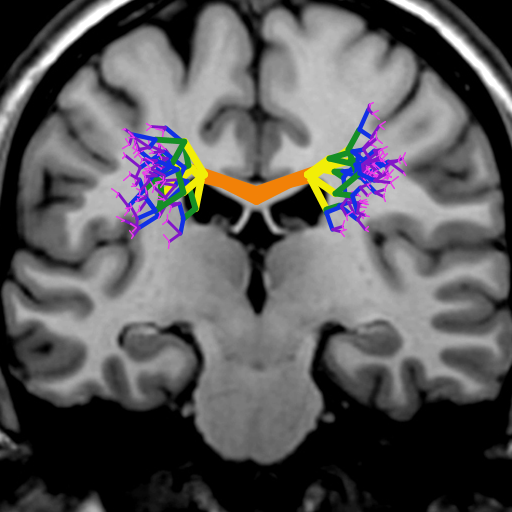
Teresa Tang

My artistic creation was inspired by diffusion tensor imaging, a method to image fiber tracts in the brain. The program simulates a DTI of the corpus callosum, the largest axon bundle in human brains. The positions of the axons were always random to some degree to reflect the individuality of real brains, and the fibers become thinner at the edges as they separate from each other.
My artistic creation was inspired by diffusion tensor imaging, a method to image fiber tracts in the brain. The program simulates a DTI of the corpus callosum, the largest axon bundle in human brains. The positions of the axons were always random to some degree to reflect the individuality of real brains, and the fibers become thinner at the edges as they separate from each other. My artistic creation was inspired by diffusion tensor imaging, a method to image fiber tracts in the brain. The program simulates a DTI of the corpus callosum, the largest axon bundle in human brains. The positions of the axons were always random to some degree to reflect the individuality of real brains, and the fibers become thinner at the edges as they separate from each other. My artistic creation was inspired by diffusion tensor imaging, a method to image fiber tracts in the brain. The program simulates a DTI of the corpus callosum, the largest axon bundle in human brains. The positions of the axons were always random to some degree to reflect the individuality of real brains, and the fibers become thinner at the edges as they separate from each other. My artistic creation was inspired by diffusion tensor imaging, a method to image fiber tracts in the brain. The program simulates a DTI of the corpus callosum, the largest axon bundle in human brains. The positions of the axons were always random to some degree to reflect the individuality of real brains, and the fibers become thinner at the edges as they separate from each other. My artistic creation was inspired by diffusion tensor imaging, a method to image fiber tracts in the brain. The program simulates a DTI of the corpus callosum, the largest axon bundle in human brains. The positions of the axons were always random to some degree to reflect the individuality of real brains, and the fibers become thinner at the edges as they separate from each other. My artistic creation was inspired by diffusion tensor imaging, a method to image fiber tracts in the brain. The program simulates a DTI of the corpus callosum, the largest axon bundle in human brains. The positions of the axons were always random to some degree to reflect the individuality of real brains, and the fibers become thinner at the edges as they separate from each other.
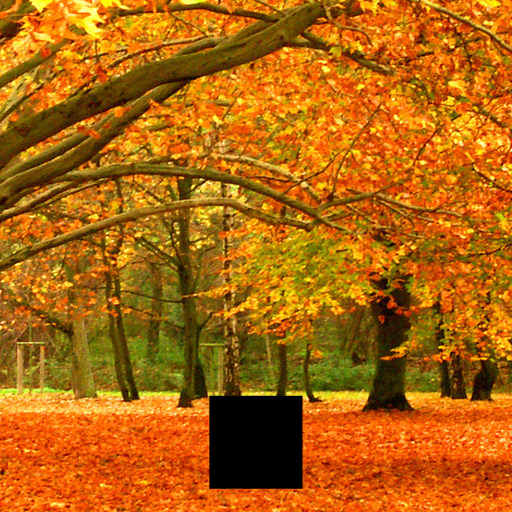
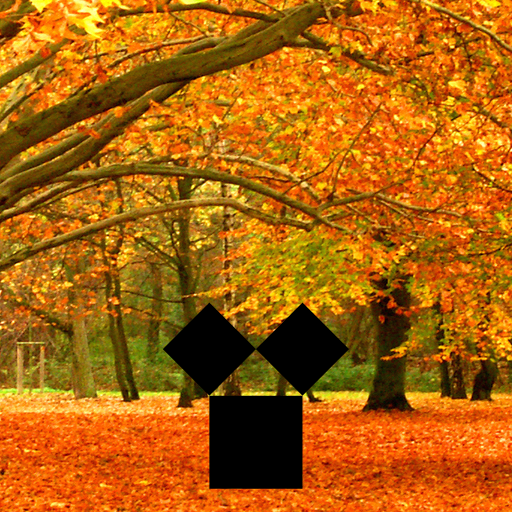
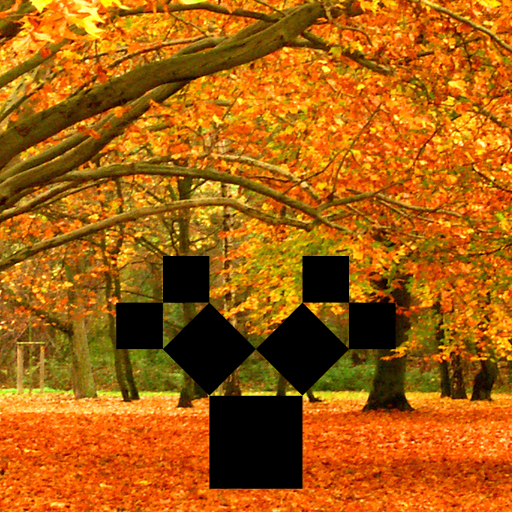
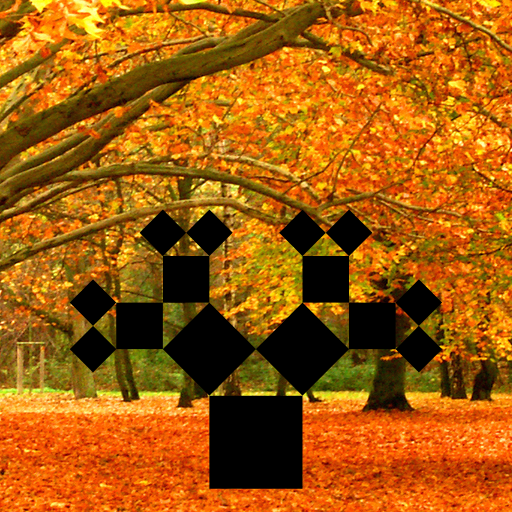
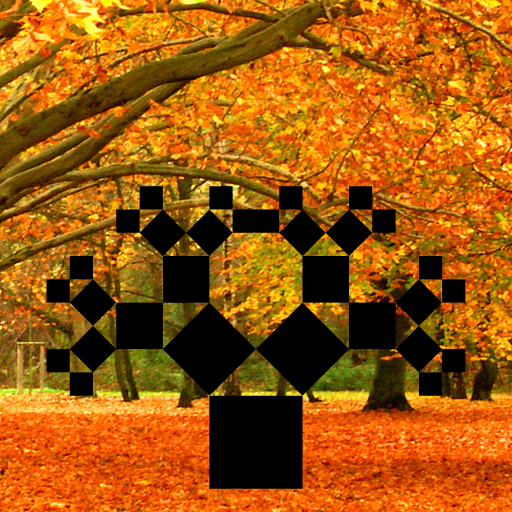
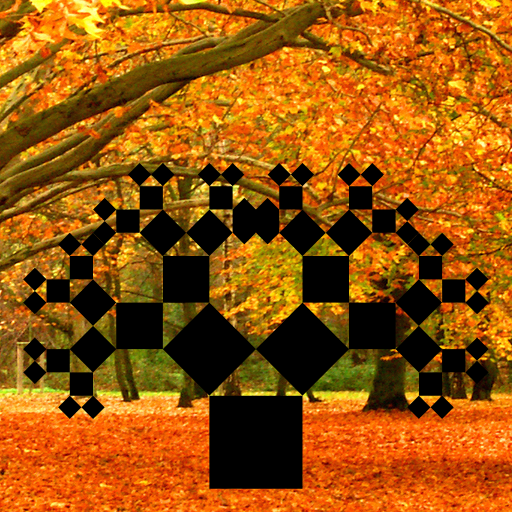
Natasha Turkmani

The fall weather served as an inspiration for my design. I recreated the Pythagoras tree which recursively draws two squares with side lengths that are the sides of a right triangle. The triangle's hypotenuse is the side length of the higher-order square. I browsed through Wikipedia's fractal page and was intrigued by the Pythagorean tree, specifically by how simple squares can create an organic image. I used the following website to understand the concepts behind the Pythagorean tree: http://ecademy.agnesscott.edu/~lriddle/ifs/pythagorean/pythTree.htm. I also researched the mathematical rotation matrix to develop the rotate() method, using this website: http://www.euclideanspace.com/maths/geometry/affine/aroundPoint/
The fall weather served as an inspiration for my design. I recreated the Pythagoras tree which recursively draws two squares with side lengths that are the sides of a right triangle. The triangle's  hypotenuse is the side length of the higher-order square. I browsed through Wikipedia's fractal page and was intrigued by the Pythagorean tree, specifically by how simple squares can create an organic image. I used the following website to understand the concepts behind the Pythagorean tree: http://ecademy.agnesscott.edu/~lriddle/ifs/pythagorean/pythTree.htm. I also researched the mathematical rotation matrix to develop the rotate() method, using this website: http://www.euclideanspace.com/maths/geometry/affine/aroundPoint/ The fall weather served as an inspiration for my design. I recreated the Pythagoras tree which recursively draws two squares with side lengths that are the sides of a right triangle. The triangle's  hypotenuse is the side length of the higher-order square. I browsed through Wikipedia's fractal page and was intrigued by the Pythagorean tree, specifically by how simple squares can create an organic image. I used the following website to understand the concepts behind the Pythagorean tree: http://ecademy.agnesscott.edu/~lriddle/ifs/pythagorean/pythTree.htm. I also researched the mathematical rotation matrix to develop the rotate() method, using this website: http://www.euclideanspace.com/maths/geometry/affine/aroundPoint/ The fall weather served as an inspiration for my design. I recreated the Pythagoras tree which recursively draws two squares with side lengths that are the sides of a right triangle. The triangle's  hypotenuse is the side length of the higher-order square. I browsed through Wikipedia's fractal page and was intrigued by the Pythagorean tree, specifically by how simple squares can create an organic image. I used the following website to understand the concepts behind the Pythagorean tree: http://ecademy.agnesscott.edu/~lriddle/ifs/pythagorean/pythTree.htm. I also researched the mathematical rotation matrix to develop the rotate() method, using this website: http://www.euclideanspace.com/maths/geometry/affine/aroundPoint/ The fall weather served as an inspiration for my design. I recreated the Pythagoras tree which recursively draws two squares with side lengths that are the sides of a right triangle. The triangle's  hypotenuse is the side length of the higher-order square. I browsed through Wikipedia's fractal page and was intrigued by the Pythagorean tree, specifically by how simple squares can create an organic image. I used the following website to understand the concepts behind the Pythagorean tree: http://ecademy.agnesscott.edu/~lriddle/ifs/pythagorean/pythTree.htm. I also researched the mathematical rotation matrix to develop the rotate() method, using this website: http://www.euclideanspace.com/maths/geometry/affine/aroundPoint/ The fall weather served as an inspiration for my design. I recreated the Pythagoras tree which recursively draws two squares with side lengths that are the sides of a right triangle. The triangle's  hypotenuse is the side length of the higher-order square. I browsed through Wikipedia's fractal page and was intrigued by the Pythagorean tree, specifically by how simple squares can create an organic image. I used the following website to understand the concepts behind the Pythagorean tree: http://ecademy.agnesscott.edu/~lriddle/ifs/pythagorean/pythTree.htm. I also researched the mathematical rotation matrix to develop the rotate() method, using this website: http://www.euclideanspace.com/maths/geometry/affine/aroundPoint/ The fall weather served as an inspiration for my design. I recreated the Pythagoras tree which recursively draws two squares with side lengths that are the sides of a right triangle. The triangle's  hypotenuse is the side length of the higher-order square. I browsed through Wikipedia's fractal page and was intrigued by the Pythagorean tree, specifically by how simple squares can create an organic image. I used the following website to understand the concepts behind the Pythagorean tree: http://ecademy.agnesscott.edu/~lriddle/ifs/pythagorean/pythTree.htm. I also researched the mathematical rotation matrix to develop the rotate() method, using this website: http://www.euclideanspace.com/maths/geometry/affine/aroundPoint/