| The same Desktop at three different resolutions | ||
 |
 |
 |
| 1024 x 768 | 800 x 600 | 640 x 480 |
Have you ever wished that you could make your own pictures and buttons, logos and background images for your web page instead of mixing and matching the ones you've found on the Web? This lab will show you how.
First, you'll get a little bit of background information about what pixels are, how image files are compressed etc. This will help you understand some of the terminology you'll hear later on. Next, you'll begin creating your own images with a program called Paint Shop Pro. It has lots of great built-in functions to help you create professional-looking graphics in no time.
Once you're comfortable with Paint Shop, you can try out your skills in photo retouching -- pasting your face onto someone else's body. Finally, you'll create an image map (a web graphic where different clickable parts lead to different pages) for your homepage.
Paint Shop Pro is supposed to be available on the cluster machines. If you can't find it, or if you are working at home, you can download version 4.1 and install it on your Windows machine. This version is shareware; if you like it, buy the current version.
Important: Material on other web sites may be subject to copyright, and there are University restrictions on what you can do with copyrighted material, including images and sound. The law is evolving in this area and copyright holders are becoming more aggressive in asserting their rights (and sometimes more than their rights). You should be aware of the University's policy on fair use of electronic materials; in part, this says that although making copies of small segments of another's works for projects or papers is fair use, "Students may not display the segments publicly. For example, students may not place them on a personal, course, or group Web page that is unrestricted in access." You should be especially careful of images that might be of significant commercial value to their copyright owners.
For purposes of this lab, and in creating other web pages, you should add a citation for each image or sound that comes from somewhere else, whether you link to it or use a local copy; this is directly equivalent to citing sources of quotations in a paper.
Part 1: How digital images work
Part 2: Creating your own images
Part 3: Using image filters
Part 4: Face pasting
Part 5: Creating image maps
Part 6: Submitting your work
The computer's screen is divided into a large number of tiny dots of color called pixels. These dots are so small that, to the human eye, they appear to make a continuous picture, but if you zoom in on any computer graphic, you will eventually begin to see the blocks of solid color of which the image is composed. To give you an idea of their size, the dot of an "i" is often represented by a single pixel.
A typical monitor can display 1024 pixels in the horizontal direction and 768 in the vertical, making almost 800,000 pixels. This figure is known as the resolution for monitors (it's calculated differently for printers, though the idea is the same). Since a monitor has fixed dimensions, switching to a higher resolution causes is to display many more smaller pixels -- so you see more but everything is smaller.
| The same Desktop at three different resolutions | ||
|
|
|
| 1024 x 768 | 800 x 600 | 640 x 480 |
Each pixel has its own color, typically represented by three values, one for red, one for blue, and one for green (RGB). These values control how much of that color appears in the pixel. Black would be all zeros, while white would have max values. Pure red would have just the red value raised to the maximum, while bluish-green might have the blue and the green values set to half of the max, and the red value set to zero. All colors are represented by a combination of the three colors red, blue, and green.
In HTML, rather than use the name of the color as described in
Lab 3, you can also use the RGB definition of the color in a
manner similar to what is described above. Once again we start
by using a tag to define the font color, and then using another
tag to show where the color change ends. Instead of the name, we
use "#rrggbb", where rr represents how much red we want, gg
represents how much green and bb represents how much blue. The
values are in hexadecimal, so each digit ranges from 0 to
F. This means that the range for each 2-digit color is 00 to FF,
or in decimal, 0 to 255. For example
Your computer has video memory that holds the pixels that are displayed. For a fixed amount of video memory in the computer, there is a tradeoff between resolution and number of colors. For example, a display memory of 1 megabyte can have any of the following settings:
The number of colors a display uses is known as its Color Depth. Color depth is also used to describe digital images. Unlike your screen, however, which has a fixed pixel-to-color relationship, images you create can usually be of any size and color depth. Ideally, you could always work with as many colors as possible, making photo-realistic images. Often, however, images which "use" 16 million colors will look the same in 256 colors. This is because they're not actually using more than 256 of the 16 million available colors.
Since large pictures take up more disk space and load more slowly on the Web, you'll probably want to experiment with your images and see how few colors you can use while preserving adequate image quality.
There are other ways to make image files smaller. Normally, images are saved as bitmaps. Each pixel and its color information are saved separately. This preserves the image perfectly but takes much more space than is necessary. Since most images have large blocks of constant color, we can use that information to group pixels and store less information about them. If there are five blue pixels in a row, it's probably better to remember "blue, 5" than to remember "blue, blue, blue, blue, blue".
Taking advantage of pixel similarities to reduce the stored information is called compression. You will not need to worry about the specific techniques used to compress files. Instead, you can use two file formats which do this automatically.
| Transparent | Not Transparent |
 |
To save your image as one of these types of files, just choose GIF or JPG from the box underneath the Filename in the "Save As.." window.
To create and edit images, you must use an Image Editor such as Adobe's PhotoShop, Corel's PhotoPaint or any number of other graphics programs. In this lab, you will be using PaintShop Pro. While it does not have as many features as PhotoShop, it is much simpler to use and much less expensive.
Generally, image editors are pretty self-explanatory. They usually display one or more large white canvasses with a bar or window of tools. Choosing a paintbrush and dragging it on the the canvas works much like painting in real life. Choosing the paint bucket and clicking on an area will fill it with the current color. Soon enough, you will get a chance to experiment with all of these options.
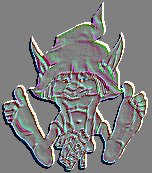
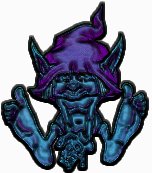
Once you have drawn an image, however, you may wish to play with several of the Image Filters available. These can be found at the bottom of the Image menu. When selected, these Image filters (e.g., Sharpen, Emboss, etc.) will examine and possibly change each and every pixel in the image. The Sharpen filter, for example, looks for edges (places where the color changes dramatically) and enhances those.
| Blurry image | After Sharpen |
 |
 |
Many filters only work on images with 16 million colors (24-bit color). This is usually because they make subtle color changes to the image and need to use many different shades.
Now it's time to experiment with Paint Shop Pro, a popular graphics program.
You should see a large window with a few toolbars across the top and an empty dark gray area in the center. This center area is where your images will appear when you edit or create them.
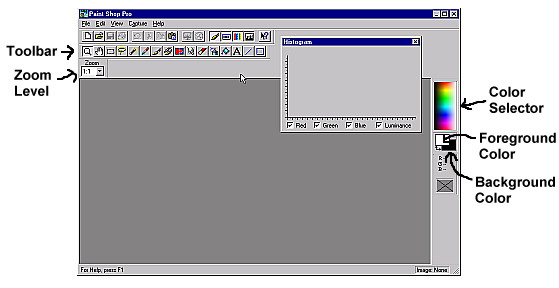
To the left, you should see the Zoom Level control. You will be able to use this to zoom in and out of your image. On the right, there is a color selector. By clicking on the color you wish to use in the palette, you can cause it to be the foreground color. This is the color that will be used when you draw with the paintbrush. By right-clicking, you can adjust the background color, which is the color used for fills and some other changes.
You may also notice a "Histogram" window. You will not need
this right now, so feel free to close it by clicking on its "X".
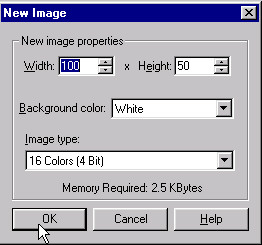
A large window should appear, filled with the background color you chose. If your Paintshop Window was not large enough for it, it may have automatically zoomed out. Be sure the Zoom Level is set to "1:1". This large area is your canvas. Using the different tools available, you can paint on it with the mouse.
If you are unsure what a particular tool does, hold the mouse over its button and look at the description given in the bottom left corner of the window. If you make mistakes, just choose "Undo" from the Edit menu to undo your last stroke or action.
Here are brief descriptions of a few of the tools available:
 | zoom in and out of pictures |
 | drag around selected areas of your image |
 | select rectangular areas of your image |
 | select non-rectangular areas of your image |
 | take a color from your image and put it on the palette as either the foreground color (if you left-click) or the background color (if you right-click) |
 | paint (check out the different sizes and options available) |
 | smudge, blur, brighten etc.. as though you were painting |
 | get a spray paint effect |
 | fill in an area with the foreground color |
 | type text into your picture |
 | draw lines |
 | draw shapes (not just rectangles) |
Now let's play with the size of your picture. Be sure that your image is selected (its titlebar should be dark).
One way to make an image smaller or larger is to shrink or enlarge it
This should change your picture to a new size. If you clicked on the checkbox next to "Maintain aspect ratio", then the picture should look larger or smaller but the same otherwise. If you didn't then it is likely that your picture got stretched or squeezed in one dimension.
Unlike resizing, cropping an image will make it smaller by cutting off the edges.
Notice that anything outside that box has been cut off from your picture.
Finally, you can change the picture back to its original size without enlarging the part you have drawn.
This should have increased your drawing area. The new space is filled with the current background color.
If you are saving your file as a JPG, it is very important that you check the current compression rate in the following way:
To best experience the image filters, you will open and edit a real photo image now.
The image should show up in its own window within the PaintShop window. As before, adjust the Zoom Level to your preference (If the control is not there, click on the magnifying glass to make it appear). Notice that you can edit and resize this image in exactly the same way as you did with the other image you just created.
Now we're ready to try the built-in image filters. All of them can be found at the bottom of the Image menu, under "Special Effects", "Deformations", "Edge Filters", "Normal Filters" and "Special Filters".
If you're interested in how filters work, try creating your own.
If you create your own filter, save the results and submit them for extra credit.
Try to figure out which filters have the following effects:
 |
 |
 |
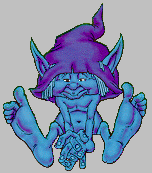
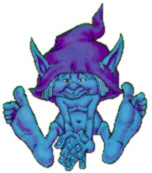
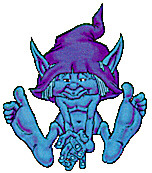
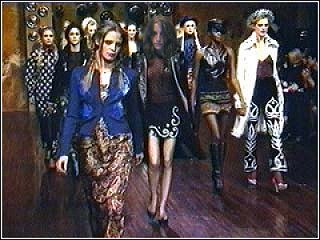
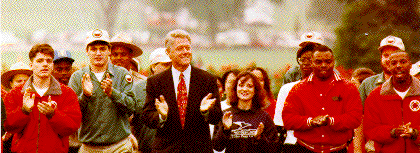
Ever wonder how the tabloids are able to get front-page photos of Elvis and Clinton shaking hands? It's called photo-retouching and one of its most entertaining applications is face-pasting. Using sophisticated graphics tools, you can cut someone's head out of one picture and paste it onto to the body of someone else in another picture.
| Original | Face-pasted |
|---|---|
 |  |
Find an interesting picture (of a person) on the Web and paste pictures of yourself and/or your friends into the picture (if you do not have a picture of yourself, find a picture of a celebrity's head and pretend that it is your head). Try to blend your picture in with the background as best as you can.
Be sure to save often. You will probably invest a lot of effort in this, so don't let a random computer crash to destroy your work. At the end of the lab, you will need to submit this image.
Here are a few tips:
| Samples (right click and choose "Save Link As" to get the full size version) |
|
 |
|
 |
 |
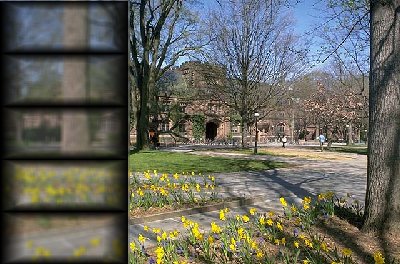
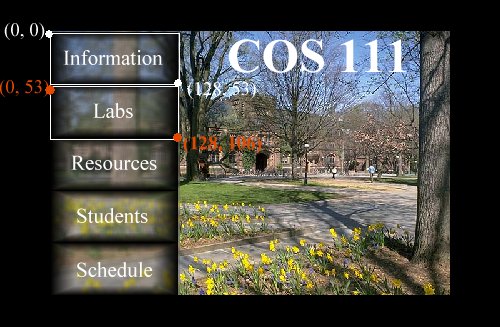
Image Maps are images included in web pages which have different clickable parts that link to different places. Try out the following image map:
Right-click on the above picture and choose "View Image". You should notice that the whole thing is one picture (even the buttons). Basically, to create a picture, you must create an image with a bunch of different rectangular parts that look like they should lead to other pages. Then, inside your HTML file, you can specify which areas of the picture should link to which pages.
Before you start creating your own image map, look for a few examples on the Web. Any time you can click on different parts of a single image in order to go to different pages, that is an image map. One example to get you started is the big image at the top of the Warner Bros. Homepage. The web sites of most large corporations will also have image maps.
For our example below, we chose one picture and then created rectangular sections within it. Review this example and then With Paint Shop, create your own image with several rectangular pictures or areas which could lead to different links. Then save it to your public_html directory. Be sure to save it as a GIF or JPG file so that it can be displayed on the WWW.
Do not make a picture that looks exactly like this one. Design your own image map!
To make your image map work, you need to know the pixel coordinates (x, y) of the top left corner and the bottom right corner of each box that you wish to make into a link. Below, we've shown a few of the values for the rectangles in our example:
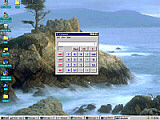
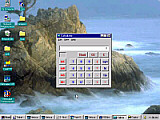
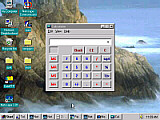
To find the coordinates of the boxes in your image, do the following:
Just for reference, here are the pixel values for OUR example:
Once you've created the image and found the coordinates for each box, you need to put all of that information in your HTML file. Look at our example and then follow the instructions to write the HTML code for your the image map you are creating.
For our example, we used the following HTML code:
<IMG SRC= im6.jpg USEMAP = #imagemap>
<MAP NAME="imagemap">
<AREA SHAPE="rect" COORDS = "0, 0, 128, 53"
	HREF=http://www.cs.princeton.edu/courses/archive/spr00/cs111/>
<AREA SHAPE="rect" COORDS = "0, 53, 128, 106"
	HREF=http://www.cs.princeton.edu/courses/archive/spr00/cs111/descrip.html#RQ-LB>
<AREA SHAPE="rect" COORDS = "0, 106, 128, 159"
	HREF=http://www.princeton.edu/Siteware/CampusServices.shtml>
<AREA SHAPE="rect" COORDS = "0, 159, 128, 212"
	HREF=http://www.cs.princeton.edu/courses/archive/spr00/cs111/STUDENTS.html>
<AREA SHAPE="rect" COORDS = "0, 212, 128, 265"
	HREF=http://www.cs.princeton.edu/courses/archive/spr00/cs111/descrip.html#SC>
</MAP>
First, we included the image with the IMG tag just like any other image, except that we told the browser where to find its map (with the attribute USEMAP). Then, we used the MAP tag to start a map section called "imagemap". Next, for each box, we included an AREA tag with the shape, coordinates and appropriate link. Finally, we closed the MAP tag with </MAP>
At the place in your HTML file where you would like your Image Map to be, type the following line:
<IMG SRC = "myimage.jpg" USEMAP = #MyImageMap>Replace "myimage.jpg" with your image's filename. This will display your image just like any other image you have included in your web page. The USEMAP attribute, however, will let the browser know that this image is an image map and will tell it where to find the information it needs to make all of the links inside it work properly.
Once you have placed the image, you need to include a section somewhere within the HTML file that contains that mapping information. Copy the following lines to your HTML file:
	<MAP NAME="MyImageMap">
	<AREA SHAPE="rect" COORDS = "x1, y1, x2, y2" HREF = "link.html">
	</MAP>
The first of these lines tells the browser that everything it sees until the </MAP> tag will be information about the links in an image map named "MyImageMap". The second line gives link information for one rectangle in your picture. Follow these directions to fill in information for all of your rectangles.
Congratulations! You should now have a working image map (which you will need to submit). If you are ambitious, you may want to create a more interesting image map with all sorts of different shapes. Follow this link for an example. There are many resources out there which can teach you how to do this, so search for one if you would like to try.
It is important to realize the difference between image maps and picture links. A picture link, is simply a link, which has a picture rather than text as the "clickable" region. With an image map, more can be done - one can divide the image into sections, and treat each section separately - this cannot be done with a picture link. The similarity is that in each case, a "button" is nothing more than a picture, until the HTML tags are put in to make it a link.
This week we'd like you to place all of your work online and just submit the URL of that page. It is easiest to just place all of the images within your homepage, but you if you do not like that, you may create a new HTML file in your public_html directory and place the images there instead. In that case, make an obvious link from your home page to Lab 3.
If you saved anything on the Desktop, be sure to transfer it to the public_html folder on arizona.
If you've completed the lab, sent your email to cs109@princeton.edu or cs111@princeton.edu and transferred your work to your Unix account, then you are finished.